
Learning how to make a website has gotten much easier over the years. And it’s never been cheaper & faster to do, than it is today. By the end of this tutorial, which features simple step-by-step instructions, screenshots and video walkthroughs, you’ll have your very own WordPress-powered website.
Deciding to make a website and start my blog right here, has been one of the best decisions I’ve ever made. Today, I teach more than 500,000 readers (and podcast listeners) how to build a real business plan around their websites—and getting started is a lot easier than you may think.
Despite any fears or reservations, I think you’ll find starting a website to be one of the smartest things you’ll have ever done.
Now is the time to take the leap and get that website you’ve been thinking about off the ground. Here’s how to make a website in three easy steps.
How to Make a Website in 3 Easy Steps (for Beginners)
- Pick your website’s hosting provider and domain name
- Choose the right website-building platform
- Design your website (and launch it)
Disclosure: Please note that some of the links below are affiliate links and at no additional cost to you, I may earn a commission. When you purchase website hosting using my Bluehost affiliate link, they compensate me, which helps make this guide to making a website free of charge to you. Know that I only recommend products and services I’ve personally used and stand behind.
These three easy steps are designed to take the complication out of how to make a website. Now, if these three steps seem like a foreign language to you… know that you’re not alone. That’s why I’m here.
I’m going to guide you through all three of these steps (in detail), so that when you’re done here—you’ll be launching your own WordPress-powered website.
No more worrying about how difficult making a website can be, just follow along as we go. Now, let’s get started!
1. Pick your website’s hosting provider and domain name
The first step in learning how to make a website is picking your website’s hosting provider.
A hosting provider is the company that “hosts” your website, powering everything behind the scenes and keeping it live, and visible on the Internet.
The hosting provider I recommend using is Bluehost. They’re very affordable and have been around in the web hosting world for nearly two decades, powering some of the world’s most popular websites. They’re my pick mainly because their customer service is top-notch and always available to help troubleshoot any technical issues while you’re still going through the process of learning how to make a website.
So, click right here to open Bluehost. Then, click the “Compare all plans” link to view the different options:
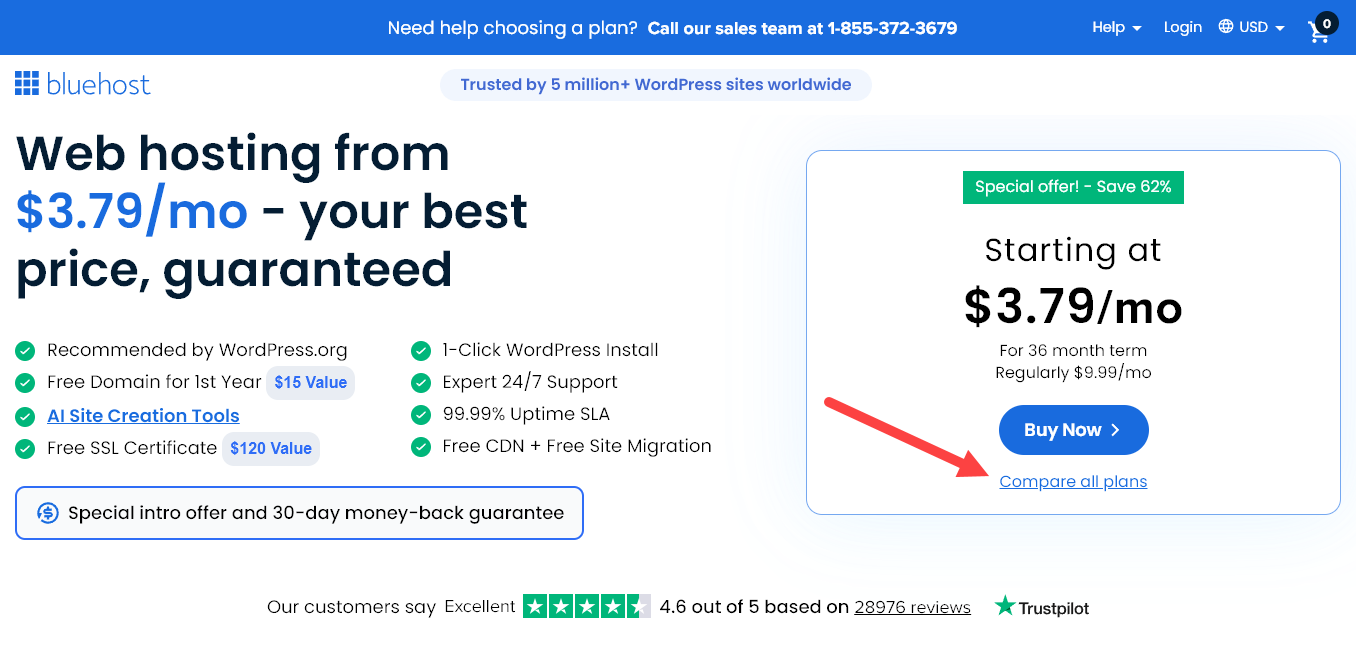
Selecting your hosting plan.
Next, you’ll select the hosting plan that’ll power your website and make it visible on the Internet. I recommend their Business plan (the current equivalent of the Choice+ plan that I originally used to make my website). It comes with their Domain Privacy feature included free for your first year, which hides your personal information (name, email, phone number, and address) from being published anywhere online as the official owner of your website. With this plan, Bluehost protects that information on your behalf.
Click the blue “Select” button on the plan of your choice:
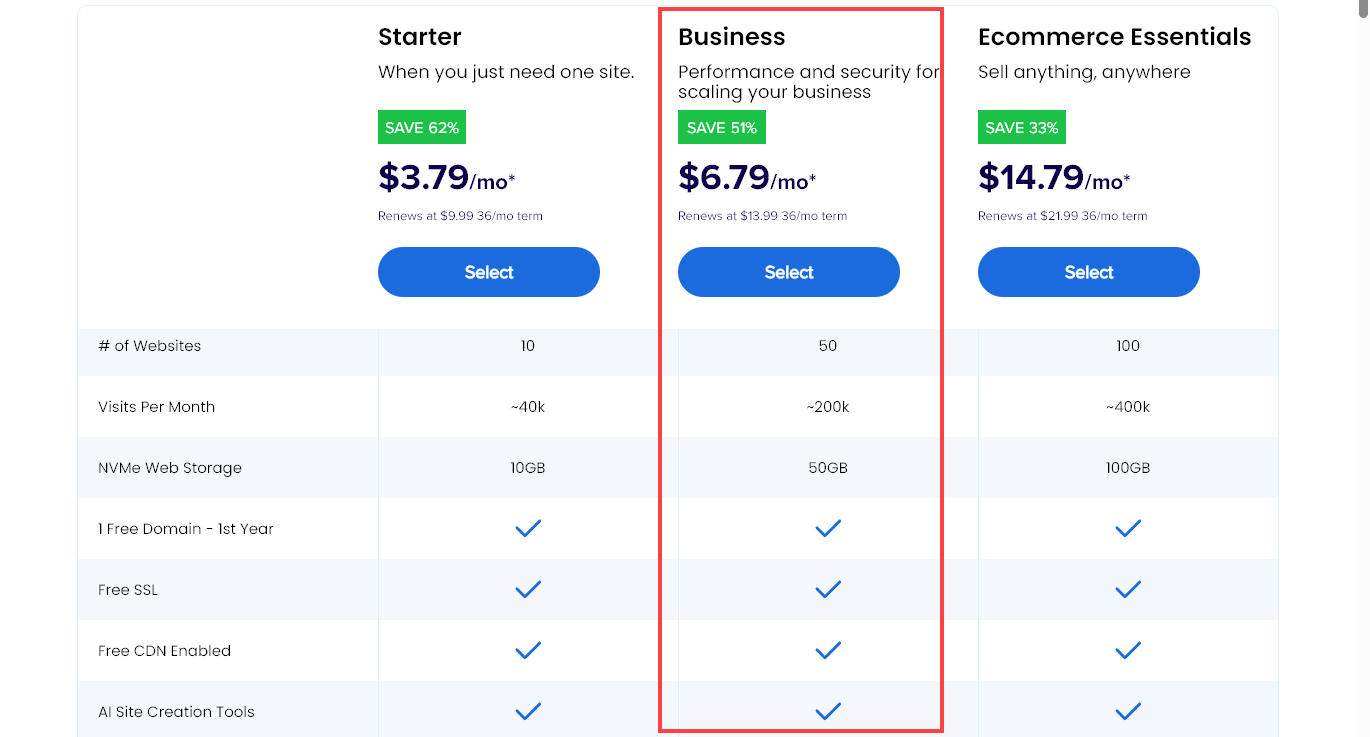
Any of these hosting plans will be fine as you’re learning to make a website—and you can always come back to add the domain privacy in later either during the checkout process or further on down the line for around $1/mo extra to your plan.
Next, you’ll need to pick a domain name for your website.
A domain name is your website’s address on the Internet.
Mine here, is ryrob.com, a nickname I’ve had for many years—so it was immediately one of my top blog name ideas.
Your domain name should be at least somewhat related to either your business, your name, or the topics you plan on writing about. It can be something like yourwebsite.com or bobscargarage.org. There are practically limitless options when it comes to picking a domain name (that’s available).
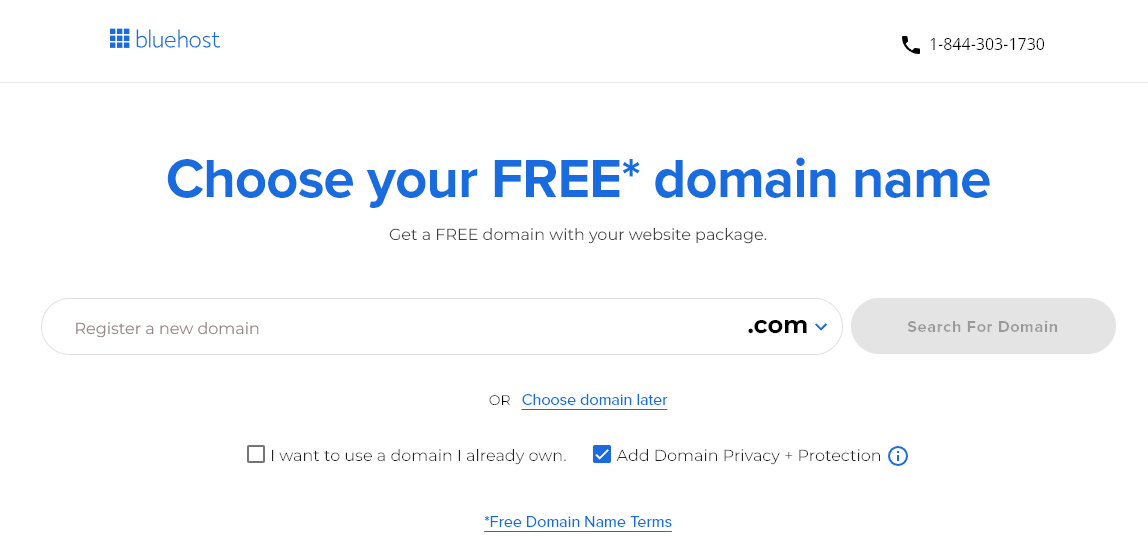
Here, you’ll type in the domain name you want your website to have.
If your first domain name of choice isn’t available (which is a likely possibility), you can either try another option that comes to mind—or (what I recommend) select the option to choose your domain name later after getting the rest of your hosting plan squared away and taking a little more time to think the website name through. Just click the “Choose domain later” link.
I cover much more about how to choose the right name for your website in this guide if you’ve not yet decided. You can use tools like this great business name generator to come up with even more ideas too.
After either choosing your domain name or opting to pick it later, you’ll be taken to the final step in the sign-up process—creating your account.
Creating your hosting account.
Fill in all of your account details (note: it’s important to use a current email address because that’s where your login details will be sent).
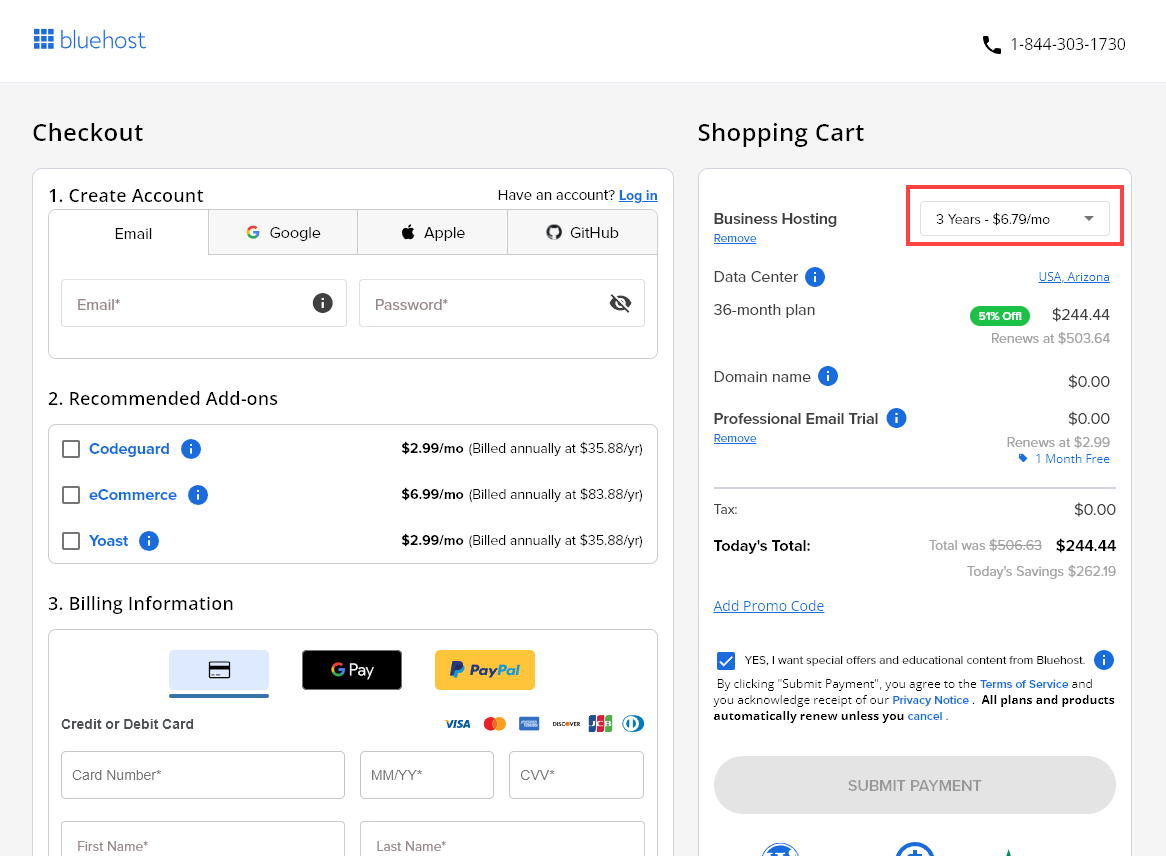
Getting the right hosting package.
On the right hand side, you’ll choose the package you want. You can pay upfront for 1, 3, or 4 years upfront in one single payment. You can also opt for the monthly payment option, but this is quite a bit more expensive (Dreamhost is another hosting company that offers monthly payments as are these other monthly hosting plans). But one advantage of using Bluehost is that with whichever 1 year or longer plan you choose, the price works out to be an overall better deal than just about any other hosting company can offer.
Which plan is the best?
I recommend the “3 Year Price” because it usually locks in the lowest possible price for hosting your website. That’s what I’ve used, and it guarantees your website hosting at their lowest rate (including domain privacy) for the next 3 years. For that reason, I recommend going with the longest duration plan that your budget can spring for (to save on overall costs in the long run). If you can afford 4 years upfront, that keeps your costs in the fourth year lower, too.
What about the add-ons? (Skip all but one)
I recommend keeping the Domain Privacy Protection extra on your plan (if you’ve selected a plan that doesn’t automatically include it) but you can skip the rest. There are plenty of free and cheap WordPress plugins & blogging tools you can use for SEO, additional security, backups, and getting email set up on your website—making most of these package extras not necessary for the average website owner.
The total you see is the amount you’re going to pay for getting your website online today. That means though, that you won’t have to pay again for 1, 2 or 3 years depending on the hosting plan you chose. Plus, Bluehost offers a 30-day money-back guarantee if things don’t go as planned with your website.
Input your billing information.
Finally, you’ll type in your billing information, check the box that you agree to their Terms of Service, and then hit the green “Submit” button.
And… boom! 🎉
You just checked off the first (and biggest) step in how to make a website.
Now, on the very next page after completing your checkout with Bluehost, you’ll be guided step-by-step through the process of installing WordPress as the free website-building platform on your website. This is where you’ll control the visual look of your website and where you’ll publish new pages or blog posts from.
An alternative website hosting provider to consider
Cloudways: Over the years, I’ve come to really appreciate Cloudways as a strong alternative for those who want more flexibility with their hosting. They offer the same core essentials like a 1-click WordPress installation and free SSL certificate, along with the added benefit of true cloud hosting.
Cloudways’ biggest selling point is its pay as you go pricing model, with plans starting at just $9.80/mo for the first 3 months using code RYROB30. There are no long term contracts, making it easy to scale your hosting as your website grows.
And if you’re considering all options for hosting your website, I’d highly recommend comparing your options in my massive guide to the best web hosting plans for bloggers this year—and be sure to read my roundup of honest Bluehost reviews to see what others have to say about the platform.
Ok, let’s keep moving!
2. Choose the right website-building platform
Of all the website-building platforms on the market today, it’s estimated that WordPress powers upwards of 60% of the websites on the Internet.
Why? Because its hands down the easiest website builder to learn and also offers the widest range of customization abilities—not to mention it’s completely free to use.
That’s why I use it. That’s why millions of small business owners, bloggers, and publishers use it to make their websites too.
What is WordPress? WordPress is a website-building platform (started in 2003) to help publishers, businesses, and bloggers quickly build, publish, and maintain websites without having to hire a technical team to do it.
If you’ve chosen to make a website using Bluehost as your hosting provider (following along with this guide), here’s what that super quick WordPress installation process will look like:
Now, to be fair, there are many other different website builders out there that you can consider—Wix, Squarespace, Weebly to name just a few.
A quick Google search will literally overwhelm you with options.
However, each and every one of these platforms will also require some sort of additional payment in order to use their building tools—ranging from $6 to upwards of $100/mo depending upon the features you need. Most will also require that you sign up for a hosting plan with them too (which will be more expensive than with Bluehost).
You don’t need to pay extra in order to have a good website-building platform.
WordPress is free to use, and truly better than any other platform out there today. That’s what we’ll be using to make your website here today.
This version of WordPress is what’s called a self-hosted blog (powered by WordPress)—which is when you go out to secure your own hosting plan (through Bluehost) and then install free WordPress as the Content Management System (CMS) to power the design of your website.
Along with being free to use, WordPress also boasts well into the thousands of people who’ve built (both free and paid) themes and plugins you can use to very easily customize the look, feel, and functionality of your website without the need to code at all.
What is a WordPress theme? A WordPress theme is a series of page templates and stylesheets that are used to dictate the appearance of a WordPress-powered website.
What is a WordPress plugin? A WordPress Plugin is a piece of software you can upload, that contains functions you can add to your WordPress website. They typically add more functionality or enable brand-new features on your WordPress-powered website.
You can follow the short tutorial video above, to get WordPress installed on your website in a matter of minutes.
We’ll pick right back up here with the third and final step of our tutorial about how to make a website… designing and launching.
Keeping in mind that
3. Design your website (and launch it)
If your eventual plan is to make money from your website, you’ll want to build an aesthetically appealing site that’s easy to navigate.
Why the design of your website is so important
Readers today judge the visual presentation of a website in a fraction of a second. If it looks out-of-date, untrustworthy, or doesn’t match their expectations… they’re gone. Off to a competitor’s website.
One important thing that good design does, is build trust with your readers.
It shows the people visiting your website that you care enough to make it look nice. That you’re invested in the visual presentation of your business.
Use this (free) WordPress theme to make your website.
WordPress comes with countless free themes you can choose from, and I recommend going with the free Elementor WordPress theme.
Immediately after you download the free version of Elementor, you’ll get their very detailed instructions on how to install & optimize the theme on your website.
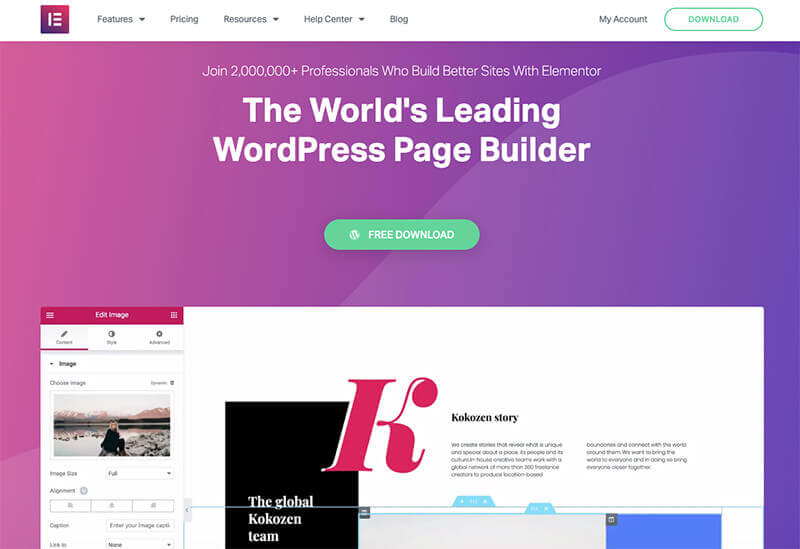
I like Elementor so much because it’s clean, and simple and will get you to a great starting point without needing to invest in a paid theme as you’re still just learning how to make a website and get everything dialed in. Plus, over 2 million other people have used Elementor to make a website, and they’ve been perfecting the theme for many years.
Then later on down the line as your website begins to drive in more traffic, Elementor’s super affordable upgrade options can unlock more widgets, templates, and design resources.
Once you’ve installed Elementor on your website, let’s dig into the essential WordPress plugins you’ll want to install, in order to add a few more key features to your website. (And if Elementor isn’t your style, then check out my list of 25+ Best WordPress Themes for Bloggers)
6 WordPress plugins to install on your website (right away)
As we’ve touched upon already, the right plugins let you add new features to your website.
They enable you to do things like collect the email addresses of your readers, dial in your blog SEO (Search Engine Optimization), keep an eye on your website analytics, make your website load faster and seriously so much more.
To cut through the noise out there in the plugin world, here are six must-install WordPress plugins. Note though, that some of these plugins will make more or less sense depending upon the type of website you’re making.
1. Yoast SEO
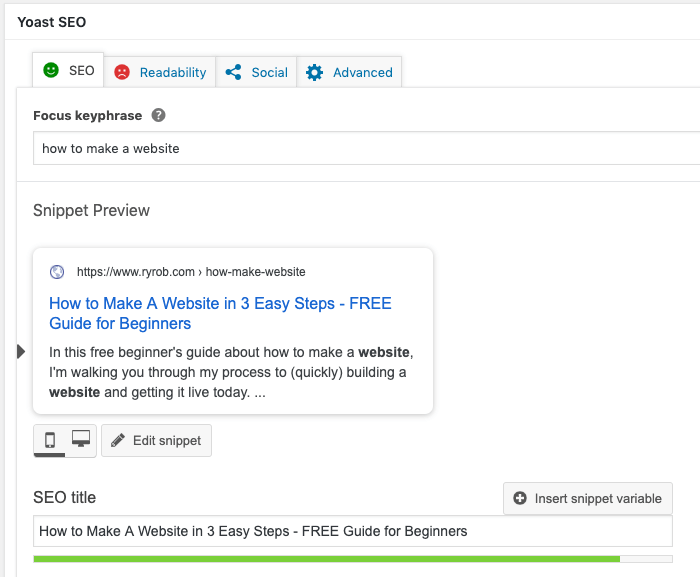
The (free) Yoast WordPress plugin will help you write strong blog content, perfect your blog headlines, descriptions, and article length, and dial in other key SEO strategies across your entire website, in order to increase your chances of ranking high in Google search results.
2. OptinMonster. If you plan on collecting the email addresses of the readers who come to your website (to send updates or special offers), OptinMonster has a suite of tools to help you convert more readers into subscribers. Their exit-intent popups display a special offer when readers are close to leaving your site.
3. WPForms. Chances are, you’ll be creating a contact page for your website, right? (Yes 😉) WPForms is a plugin that lets you easily drag & drop contact forms onto the pages of your website while routing those messages directly to your email inbox where you can respond and keep the conversation going with your readers.
4. Social Snap. This plugin allows you to showcase a social share counter and one-click share buttons for all of the major networks like Facebook, Twitter, LinkedIn, Instagram, and Pinterest. It’s a must-install if you want to grow your website in the long run.
5. MonsterInsights. In my experience, this is the best Google Analytics plugin for WordPress-powered websites. Once installed, you’ll connect MonsterInsights to your Google Analytics account (you can sign up for a free Google Analytics account here) and it’ll create a dashboard in your WordPress admin area where you can analyze the data about who’s coming to your site, how long they’re present and what your most popular pages are.
6. WP Rocket. The truth is that faster websites tend to rank better in Google search results (and give your readers a better experience). WP Rocket is a plugin that caches the pages of your website, reduces the file sizes of assets on your website and does a lot to ensure that your site loads fast.
WordPress settings to adjust on your website.
There are countless reasons for wanting to learn how to make a website. Regardless of your blogging goals though, it pays to have a fundamental understanding of how your main WordPress settings work, so that you can control the visual appearance of your website without the help of a developer.
Here are a few of the main WordPress settings you’ll want to adjust and familiarize yourself with.
Permalinks.
If you followed along in my walkthrough video (above) when I changed the URL for the first page I published, you saw me change a permalink. For more on permalinks, check out my guide: What is a Permalink? How to Make SEO-Friendly Permalinks.
It’s important (for blog SEO best practices) to ensure your permalink settings are optimized to publish new blog posts in the format of yourwebsite.com/post-name (like you saw in the video above). This’ll help your website pages rank higher in search engines because it’s more easily digestible for them to make sense of.
In your WordPress dashboard, hover over “Settings” and navigate to Settings > Permalinks to make this change. It should look like this:
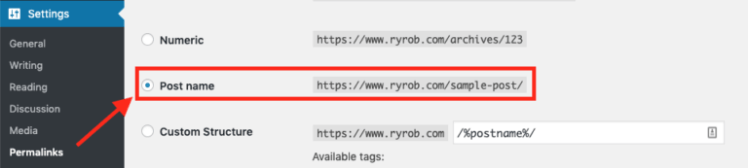
You’ll still be able to customize a page URL before hitting publish in WordPress, but now you’ve got a default URL structure that’ll be SEO-friendly.
Cleaning up your default website URL.
After your free Elementor WordPress theme is installed, I recommend cleaning up the URL of your website to omit the “www” that’s sometimes shown before your site’s URL.
That’ll bring you from a URL that looks like https://www.yourwebsitename.com to a more simplified and clean https://yourblogname.com.
You can change this quickly by going to Settings > General and removing the “www” if it’s still present in your site URL field.
All of the pages on your website will now automatically serve the cleaner-looking URL for your website.
Setting your website homepage.
As we touched on in the video tutorial above, my advice is to set your homepage to be where your new posts display (for right now).
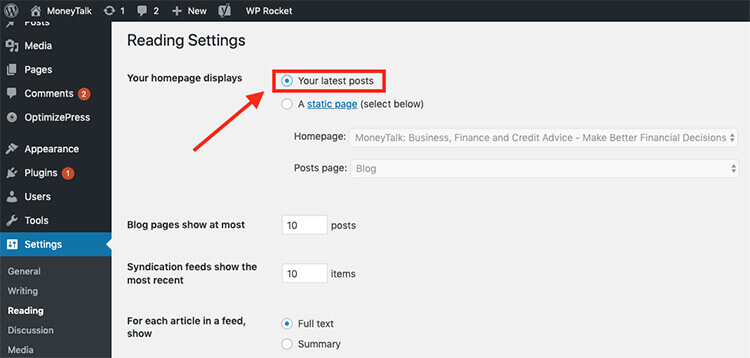
You do have the option of setting your website’s homepage to be a static, custom-designed page that can serve to capture email sign-ups, sell a product, or otherwise in the future.
But for right this moment, stick with just a list of your recent blog posts (of which there will be none for right now).
And if you’re setting your homepage to display your latest posts, consider changing the settings to show the complete text of your blog posts right there on the homepage for now, rather than a list that has short previews of each post.
Since you likely won’t have much content on your website for the next few days or weeks, that’ll make it look like there’s more content in the short term, and you can change the settings back to a list or a newly designed static front page once you’ve had more time to dig into your website.
To change these settings, just go to Settings > Reading and adjust the “For each article in a feed, show:” setting to be on “Full text”.
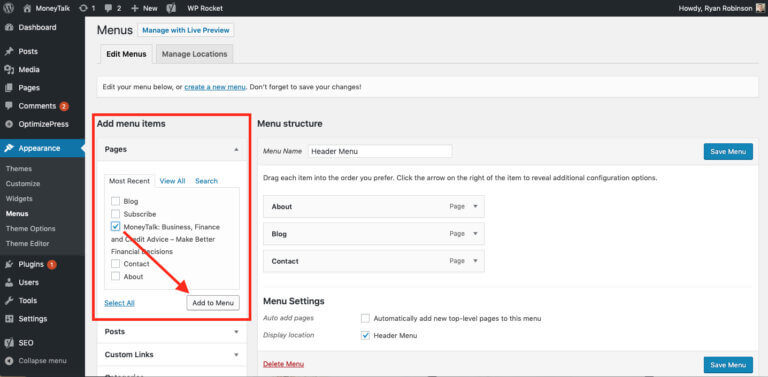
Setting up your website’s main menu.
For now, you don’t really need a menu until you’ve gotten your main pages published (About, Contact, Hire, Shop, etc), but when you’re ready to create a homepage or footer menu, just go to Appearance > Menus and you can create them in just a few clicks by adding pages over to your desired menu.
Ok! That’s it for the foundational WordPress settings you’ll want to toggle right away on your website.
You’ll benefit greatly though, from just spending a few hours poking around and seeing how some of the changes you make in your WordPress dashboard affect the visual appearance of your website. That’s part of the fun!
Now, let’s create the main pages you’ll want to have on your website.
Making your main website pages (about, contact, and hire)
Every website needs a few pages that cover the essential basics in order to establish trust with readers.
- Who are you?
- Why should people listen to, or buy from you?
- How can they reach out if they have a question or want to hire you?
These three pages are pretty standard, but they’re an easy way to have some fun and let your readers get to know you.
I actually wrote an About page (here) to not only introduce who I am and tell my story but to also explain my value proposition (for companies considering hiring me as a content marketer) and highlight any notable recent achievements.
Here are step-by-step instructions for how to create an About page that does the same:
How to write an About page for your website:
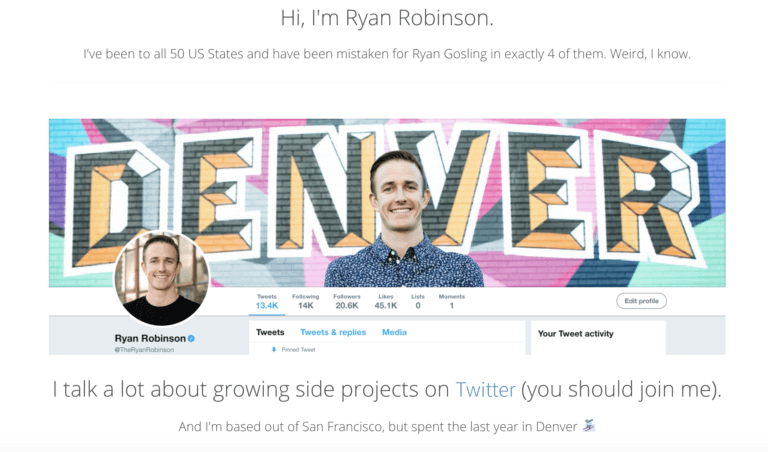
It might not take much time to put together, but your About page can actually become one of the most popular pages on your website—so it pays off to invest a little time into learning how to write an About Me page that can tell your story and convince readers why they should stick around.
You can either give your readers an old LinkedIn headshot photo and a couple of chopping sentences (like most people)… or, you can tell them a captivating story and turn them into a fan.
Let’s start with a few basic questions that every website About page should answer:
1. What’s the purpose of your website?
Sure it’s called an about page, but don’t make the mistake of talking only about yourself. Your about page should be just as much about what your website is here to do for your visitors.
First, be clear about what your website exists to do and for whom. Is your website the home base of your local business? Do you have a line of nutrition products you’re selling to fitness enthusiasts? Perhaps a freelance writing service you’re looking to grow?
This is your chance to be ultra clear about why you’re making a website and what it exists to achieve.
2. Who is your website for?
It’s important to guarantee that when the right visitors do arrive on your website, they feel right at home. Spell that out with these two approaches:
- Explicitly say who your website is for; For example, if you’re launching a website that’ll feature a community about healthy cooking for working parents, you could write: “We launched this website in 2026 to become the ultimate cooking guide for working parents.” This kind of framing is key to any savvy blogging strategy.
- Illustrate that you’re in their community: Do you write for other websites in your niche? Are you active on any popular communities or forums? Add a testimonial or social post from someone in the industry who’s tried your product or spoken highly of your website.
3. Why should your website visitors care?
If you’ve done a good job in the first couple of sections, your visitors should have a pretty good idea of who you are and be able to decide whether or not they want to keep reading. However, you can do a little more to further seal the deal and sell them on becoming more actively engaged with you.
Consider answering more specific questions like:
- What types of products you sell (or content you write about): “If you love X, Y, and Z, you’ll feel totally at home here.”
- What visitors will get out of reading your website: “I share everything I’ve learned building a 6-figure consulting business from nothing.”
- Where they should start: “If this is your first time here, check out my Ultimate Guide to X.”
- Why do you and your website have credibility: “I’m a regular contributor to Fast Company, Business Insider, and Inc. Magazine…”
- How did you get started: “Back in 2003, during an especially bad Colorado Winter, I fell in love with snowshoeing…”
Get personal here. People connect with stories and vulnerability more than they do with carefully crafted prose, so be who you are!
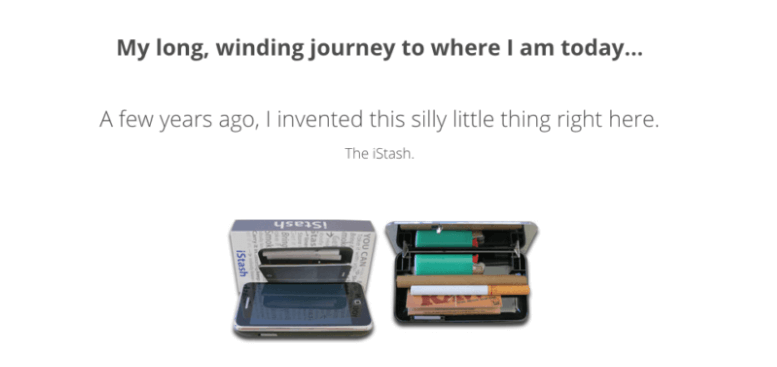
For my industry, I know my readers are here to get personal, actionable advice on starting a blog. And so I show them that I not only talk the talk, but also walk the walk by constantly working on new side blogs like VeganTable and through helping my girlfriend’s site, Vegan Anj.
4. What should your website visitors do next?
The last (and arguably most important) section to cover on your About page is telling your visitors what to do next.
- Do you want them to read your latest blog post?
- Sign up for your newsletter.
- Purchase your product?
If a website visitor has made it all the way to the bottom of your About page, then guide them to what comes next. Here’s mine:
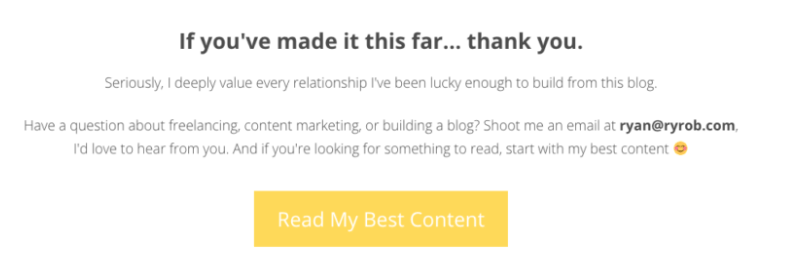
I know that if someone’s made it to the bottom of my About page, they’re probably (1) brand new to my website and (2) engaged enough to want to learn more.
So, I want them to get to know me better. That’s why my call to action (CTA) is simply to read more of my best content.
I know that the value I’m creating will hopefully get them to stick around, but at this point, I still need to earn their attention.
Your call-to-action could be something completely different if your website is designed to generate leads for your local business or sell your products.
How to write a Contact page for your website
Another often overlooked page that you’ll want to include on your website is a very simple way for people to reach out to you.
While my contact page now goes into more depth, your Contact page can be as simple as having your email and social media accounts listed on a page.
Or, if you’d rather not have your contact information out there for anyone to find, you can include a contact form.
Since you’re on WordPress, one of the best ways to do this is to use a plugin like WPForms, which lets you create custom contact forms just by dragging and dropping elements.
When you’re making your website Contact page, it’s not enough to just put up the form, however.
Think about why someone would want to get in touch with you in the first place.
- Can you answer basic questions upfront with an FAQ on your contact page?
- If you’re selling your services, can you tell people basic requirements so you don’t waste each other’s time?
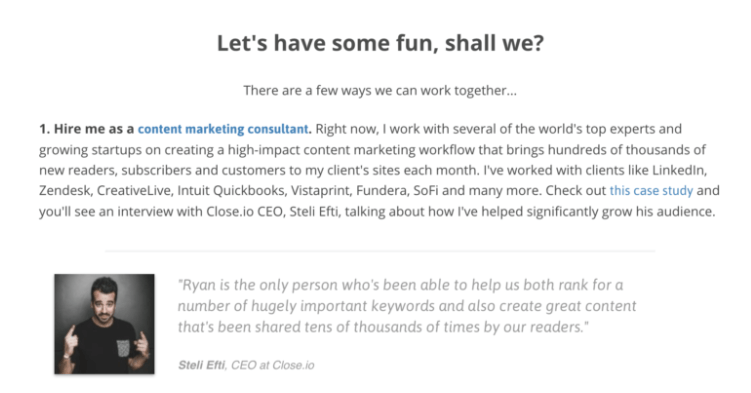
On my website, I know that people reading my content may want to hire me to help them with their own content marketing.
For that reason, I’ve chosen to make my Contact page more focused on the topic of how to “Work with Me” on my website. This page says exactly what I do, and who I’m looking to work with, and gives opportunities for people to get in touch.
Think about what types of communication you want your visitors to use and for what purpose.
You can use your Contact page to set those expectations right away.
Final Thoughts on How to Make a Website in 2026
Learning how to make a website might seem like a daunting task, but as you’ve seen… it isn’t really all that difficult.
These three steps will help you to begin the process of creating the website you’ve been dreaming of. If you want some additional learning resources, check out my picks for the best blogging books and top blogging courses to accelerate your progress.
From here, you’ll just need to invest the time into learning more about how your WordPress website functions, and which themes, plugins, and tools can help you take it to the next level.
Always remember though, the hardest part of starting a website is actually getting started. Do that and you’ll have come a long way already.
Want my Free Course: How to Start a Profitable Blog in 7 Days?
Enter your name and email address and you’ll get instant access to my course that’s been featured on Forbes, Business Insider and Entrepreneur.
"*" indicates required fields
I always tell everyone that no matter what you do whether it’s affiliate marketing, doing things off-line for your community, your off-line real-world business, or even a 9 to 5 working career, everyone needs a website. Not only is a website “preferably a self hosted WordPress blog” a virtual must have as an “unwritten rule,” but it’s also good to have in terms of recording your daily activities, creating and publishing informative-priceless content, connecting personally with online readers, building brand awareness, and becoming and authority as a person seen as “ask the expert.”
I agree with Ryan that owning your own domain name, reserving a web hosting account, and having a website is the beginning gateway to more than just achieving financial freedom. 🙂
Yes! A self-hosted WordPress website is the only setup that truly puts you in control of everything. Otherwise, you’re platform dependent upon a company like Wix, Squarespace, etc staying in business, not jacking their price up through the ceiling and hoping they don’t release any major bad updates to their building tools.
Taking the route of full control of my website was one of my best moves.
This is great can you make a kids website tour my kids want to make a website. 🙂
Oh that’s such a great idea! I’ll add that to my list of fun topics to create an article/video for soon 🙂
This tutorial was extremely helpful. Thank you Ryan for breaking it down into very simple steps.
You’re welcome, Victor! Glad you were able to take some action from this 🙂
The post was great, thank you very much, you really are a leading blogging expert
Glad to hear that, Luong! Thanks for the kind words.
Hi Ryan,
What a great post here. Definitely need to revisit this site again as it contains so much value.
Question, I have a blog up and running for a year. After reading your post on the section `Permalinks’. Is It advisable to make a change since i already have posts published?
And If i make a change on the permalinks structure, will it affect both the internal links and backlinks that I had?
Thanks.
Thanks for the kind words, Calvin! 🙏
Since you already have posts published, I’d *probably* just start manually making sure each new permalink for blog posts moving forward gets more thoughtful treatment, but from poking around on your blog it looks like your permalink structure (at least recent URLs) is solid!
This is great!
Thanks for the kind words! 🙂
Thanks Ryan for taking a quick look at my site 🙂
I was browsing through your articles..
And I was wondering if you have blog touches on website speed & link building.
Much appreciated your help.
You’re welcome, Calvin! I actually don’t have a piece (yet) on my own blog about speed optimization, though my friend Andy and I have a guide about that subject on the site we run together, here: https://smartwp.com/speed-up-wordpress/
As far as link building, I don’t personally love thinking about content promotion in the context of *just* link building… I think that’s too narrow a view to do justice to all that goes into building up the credibility of your site over the long term. However, I’d check out these guides that look at the full picture and also talk about the most effective ways I’ve attracted links to my site (and for clients) over time too:
https://www.ryrob.com/how-to-promote-your-blog/
https://www.ryrob.com/guest-blogging/
https://www.ryrob.com/blogger-outreach/
Great info in this blog, thanks for sharing
You’re so welcome, Revy!
Great post..
You made it easy making website.
Thanks for sharing great idea here.
I really enjoyed the content from your website. Would you give me a couple of minutes of your time for a particular question i have
Sure, fire away!
Thank you so much for a nice clear guide for starting a website. Your teaching style is excellent. I have a feeling I will be visiting your site often. Thank you again, Beth Bayer
Ah, you’re so welcome Beth! Good luck with your website 🙏
Some of my clients cannot afford to pay for full web design & development so from today on – I am going to redirect them to this gem! Very well-written Ryan! 🙂
Thanks, tom! 🙏
Creating a website by the use of WordPress takes a shorter time compared to building it from scratch. This is because the CMS has already been developed and so you will have time to concentrate on content and design. WordPress has a library of ready-made themes.
Agreed! 🙏
nice blog, keep posting
Thanks for the kind words!
Wordpress.org is hands down he best CMS. I tried to learn how to use others like Wix and Squarespace but I found my way back to WordPress. The platform has lots of features and plugins that make he whole aspect of creating your dream website seamless. Thanks for the reminder Ryan!
You’re welcome, Steve! I couldn’t agree more 🙂
I want to make a website, but I don’t know which platform to choose yet. I think I’ll choose WordPress. Thanks for the tips, it was very helpful for me.
You’re welcome 🙂
Thank you for the valuable information, I will for sure take this into consideration the next time.
Highly appreciate the time you took to share this informative blog.
Thanks again,
imene
You’re welcome, Imene! 🙂
Very nice
🙏
This is extremely helpful. Thank you Ryan for this step-by-step tutorial. Good job