

If you want to learn how to start a vlog (video blog), then you’re in the right place. I’ve been blogging (and video blogging) here for 10+ years.
Video blogging (vlogging) has become increasingly popular over the past decade with the rise of super-fast broadband, affordable recording equipment, and high-powered computers that can handle video editing with ease. Not to mention the fact that YouTube is the second largest search engine in the world with a whopping 5.5 billion monthly users.
Many people would rather watch a video than read a lengthy blog post—and in some niches, video content makes a lot more sense. Watching someone demonstrate a cake decorating technique, for instance, is a lot easier than trying to figure it out from written instructions.
So if you enjoy making videos, why not start your own vlog (video blog)? It’s easy to do—and it doesn’t need to cost a lot, either.
How to Start a Vlog (Video Blog) and Make Money in 2026
- What is a Vlog (Video Blog) & How’s it Different From a Regular Blog?
- Why You Need to Host Your Vlog on YouTube
- Setting Up Your YouTube Channel
- Equipment You’ll Need to Record (and Edit) Your Vlog Videos
- How to Record and Produce Your First Video Blog in 6 Easy Steps
- Creating a Website (Traditional Blog) to Support Your Vlog Growth
- How to Create Blog Posts for Your Videos
- Simple Ways for Video Bloggers to Make Money
Disclosure: Please note that some of the links below are affiliate links and at no additional cost to you, I’ll earn a commission. Know that I only recommend products and services I’ve personally used and stand behind. When you use one of my affiliate links, the company compensates me, which helps me run this blog and keep my in-depth content free of charge for readers (like you).
Ready to Start Your Blog Today?

Check out my ultimate guide How to Start a Blog (on the Side) that’s been featured on Forbes, Inc and Entrepreneur.
What is a Vlog (Video Blog) & How’s it Different From a Regular Blog?
A video blog consists primarily of videos, usually released at set intervals (e.g. one new video each week).
Most video blogs exist as YouTube channels—for reasons that we’ll come onto in a moment. These are often supported through a website or blog that has posts sharing new videos, often with some written content to support them.
The main differences between a vlog and a regular primarily written blog are:
- The type of content, obviously. If you don’t like writing or struggle to write well, a vlog is going to work much better for you than a regular blog.
- Where you host your content. If you’re writing a regular blog, you can host everything with your web hosting company. But with a vlog, you’ll need to host your videos separately (you could then embed them into a regular blog or website).
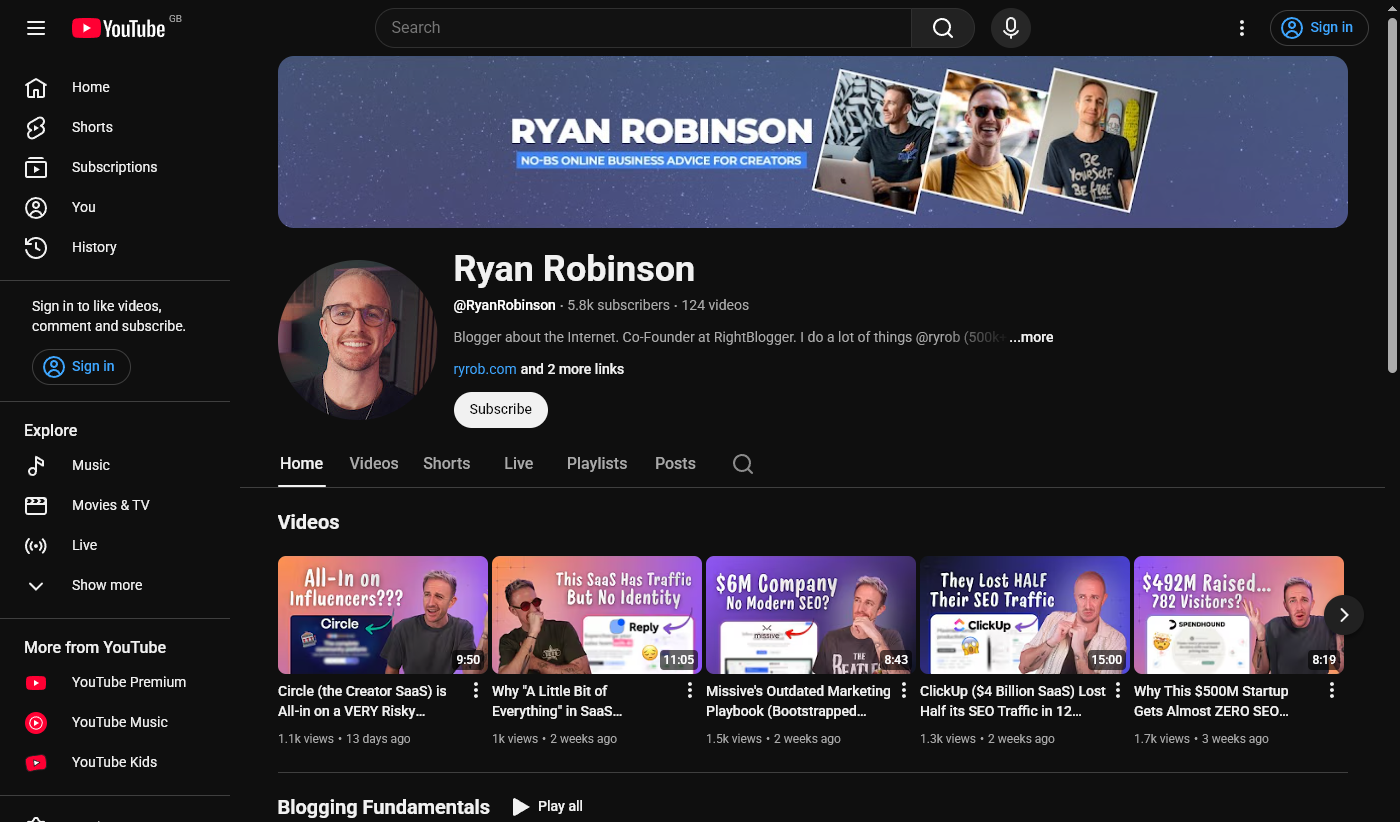
You can check out my YouTube Channel right here for a real example to gather some inspiration on approaching your own video blogging strategy.
Now, let’s dive into my guide on how to start a vlog (video blog) with an important note about where you should publish your video blogs.
Why You Need to Host Your Vlog on YouTube
One of the first differences in learning how to start a vlog vs a more traditional written blog, is that videos take up a lot of space, compared to just text and images.
For instance, the text of a long novel (or the text of hundreds of blog posts) would take up about 1MB of space.
If you have 500px wide images on your blog and you compress them for use on the web, you could squeeze maybe 100 images into 1MB of space. But you’d likely only get a few seconds of video into 1MB of space, even if you compress it.
This means that if you upload your videos to your web hosting service, you will eventually run up against space limits.
But the bigger problem isn’t about the size of your videos when they’re being stored – it’s about the amount of data that needs to be transferred when people watch them. This can use up your bandwidth incredibly fast.
This could result in one (or more!) of these:
- Your web hosting service taking your site down.
- Your site performance degrading under the flood of traffic.
- You needing to pay a much higher web hosting bill.
But when you host your videos on YouTube, you don’t need to worry about storage or bandwidth. It’s YouTube footing the bill – not you.
Another very important reason to host your videos on YouTube is that people will often use YouTube like a search engine, when looking for instructions or support. If your videos aren’t on there, they won’t find them.
Tip: You can easily embed a YouTube video into a blog post, so you can still have your videos display on your blog or website.
Setting Up Your YouTube Channel
It’s easy and free to create a YouTube channel & account to upload your videos. Here’s my step-by-step guide on how to start a vlog (and set up your YouTube channel):
Step 1. Sign Into Your Google Account, via YouTube
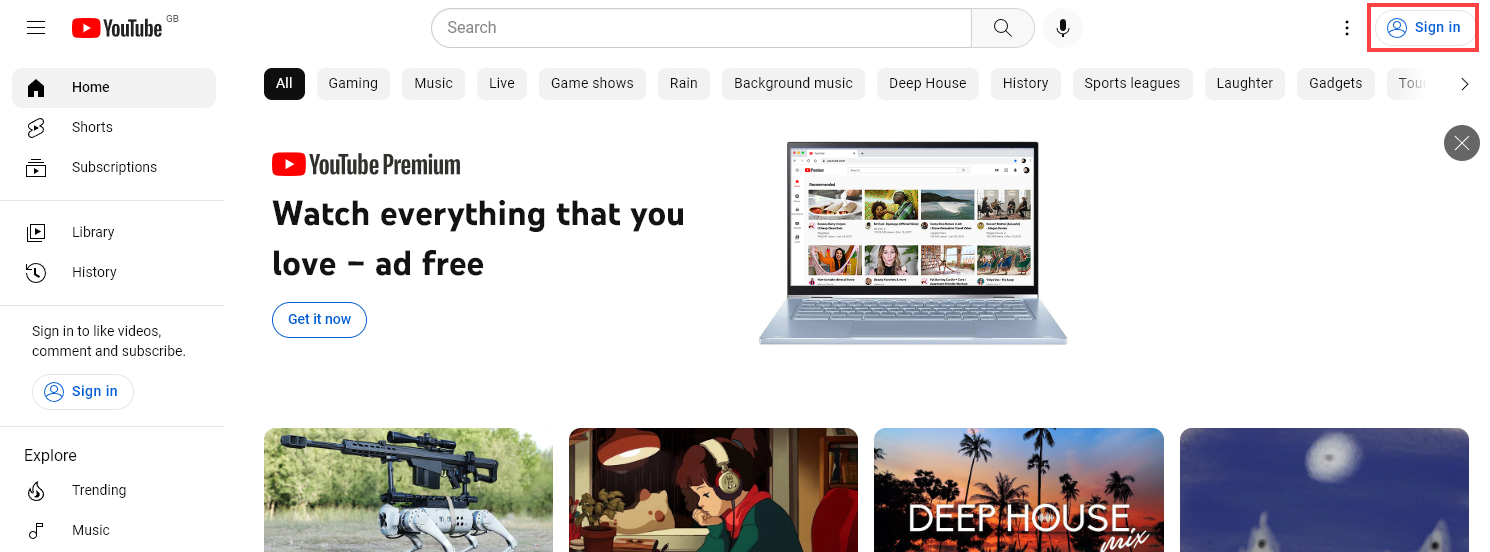
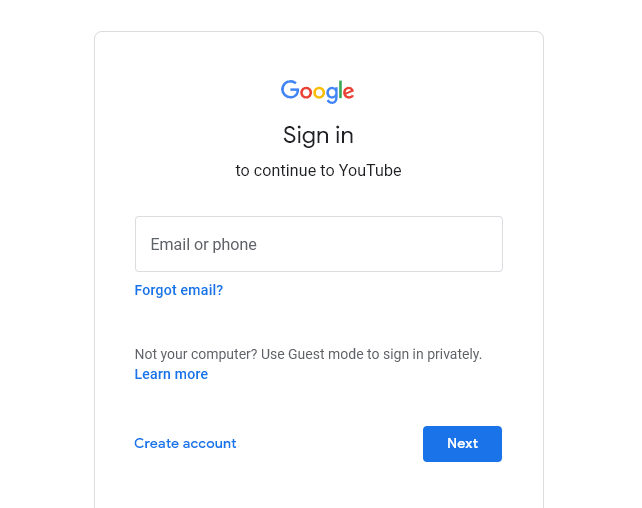
Head to the YouTube homepage, and you’ll see a Sign In button on the top right. Click on that and you’ll be prompted to sign into your Google Account. (Google owns YouTube.)
Don’t have a Google account? You can use the “Create account” link on the Sign in page to create one, either using your existing email address or by creating an @gmail.com address.
Step 2. Create Your Channel
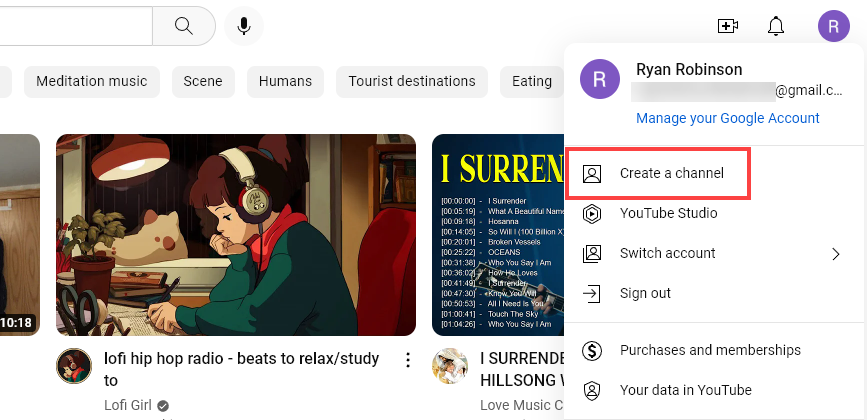
You’ll see the YouTube homepage again after signing in, with your avatar (or the first letter of your name) on the top right.
To create your YouTube channel, click on your avatar and then click the “Create a channel” link:
Next, YouTube will prompt you to choose what name and picture you want to use for your channel. Check out my tutorial on blog name ideas for some inspiration.
Once you’ve uploaded your picture and changed your channel name (if you want to change it), simply click the “Create channel” button.
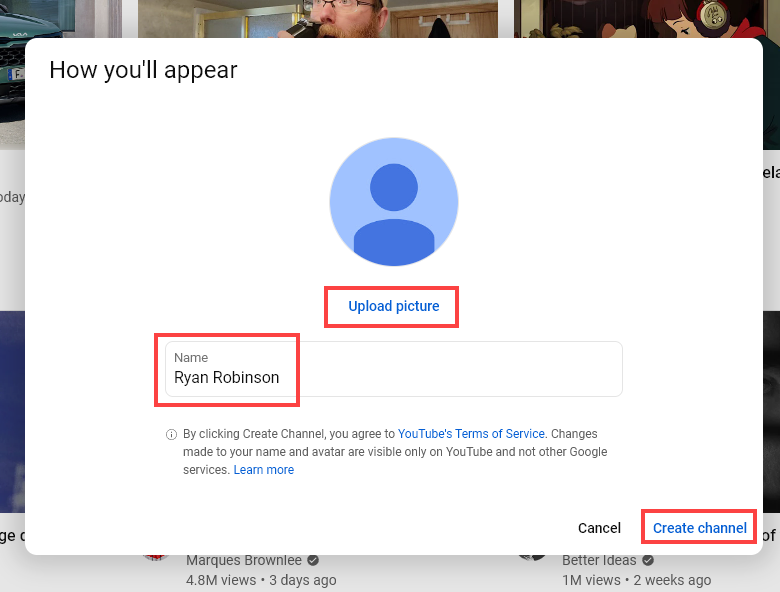
Don’t worry if you’re not sure about your channel name or picture. You can easily change these later, in the YouTube studio.
That’s it – your YouTube channel has been created! You can stop here, or you can go onto the next step and start customizing your channel.
Step 3. Customize Your Channel
As soon as your channel was created in Step 2, you should have been taken to your channel’s homepage.
Tip: If you’re coming back to this at a later stage, click on your avatar in the top right corner then select the “Your channel” link.
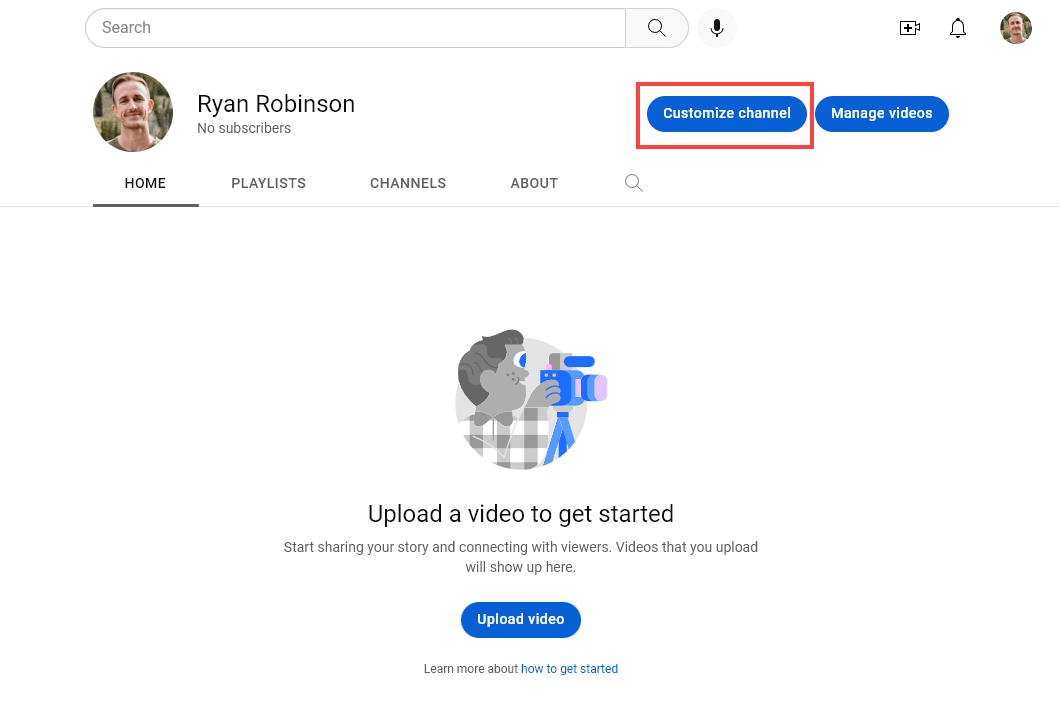
After clicking “Customize channel,” you’ll be taken to the YouTube studio. There are lots of options to explore here, like adding a channel trailer, changing the layout of your channel’s homepage, and much more.
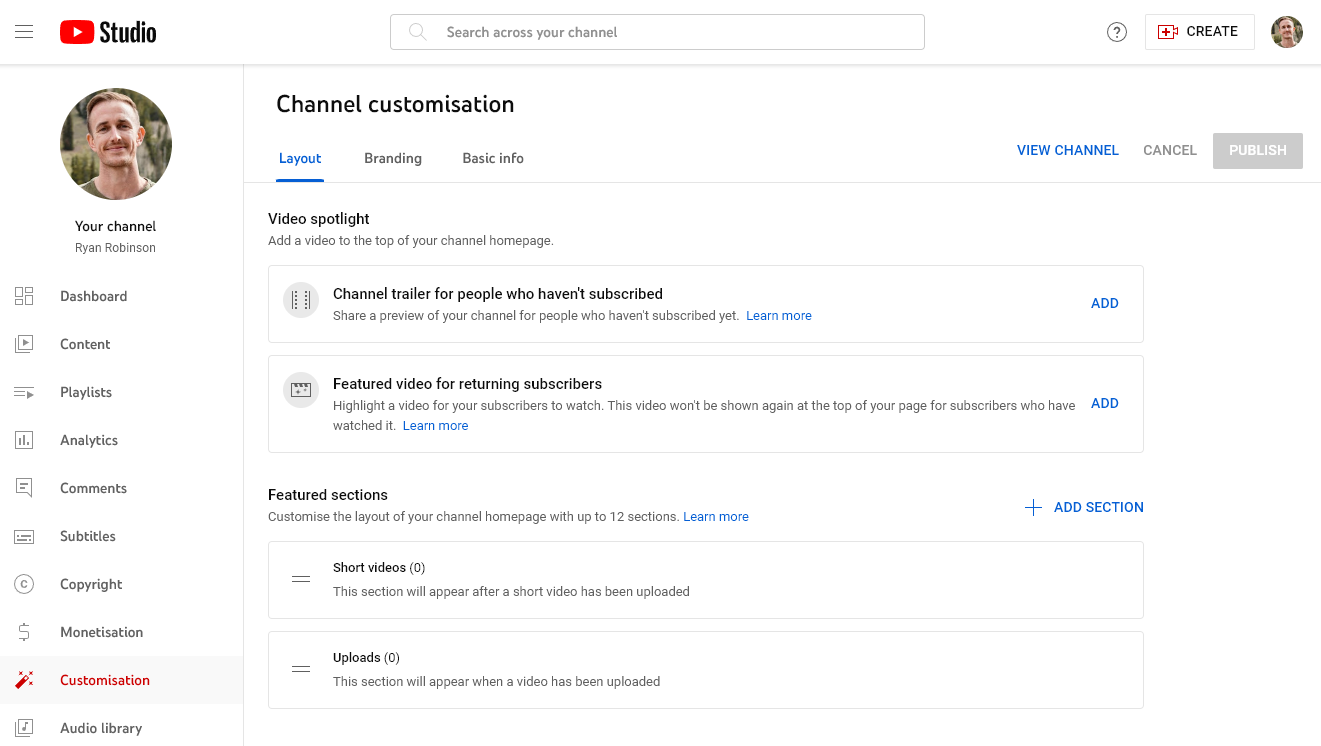
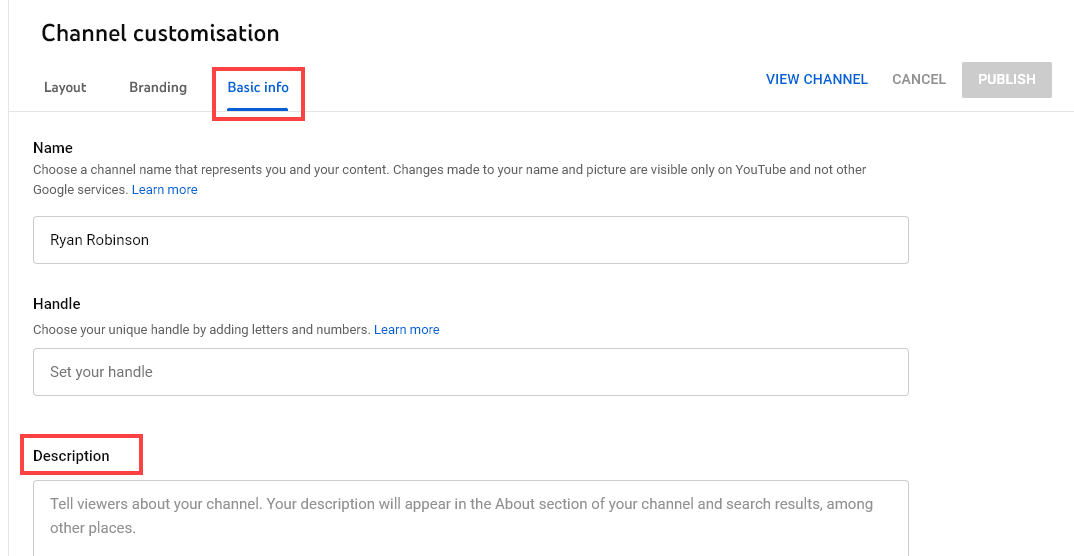
Step 4. Add a Description for Your Channel
If you click the “Basic info” tab, you can set a description for your channel. Tell people what your vlog is all about, and give them a good reason to subscribe! You can also change your channel name on this screen.
Tip: You can set a “handle” here, too. Your handle is a short version of your channel name, and it needs to start with the @ symbol. This is a new feature that YouTube started rolling out in November 2022.
Once you’re happy with the changes you’ve made, go ahead and click the Publish button on the top right.
Equipment You’ll Need to Record (and Edit) Your Vlog Videos
Now that your channel’s set up, you’ll want to start recording your videos. While you could record using your smartphone, ideally, you’ll invest in some higher-quality equipment to produce videos that look and sound good.
Camera
If you’re planning to film anything—like yourself, or a technique you’re demonstrating—then you’ll need a camera. Depending on the type of video you’re creating, you might be recording your screen instead. And remember, having the highest quality video camera in the world won’t guarantee you’ll have a successful video blog overnight.
What you choose will inevitably depend on your budget—but some commonly recommended cameras for vloggers include:
- Sony ZV-1: This fantastic camera has excellent autofocus, is compact and powerful, and costs around $750.
- DJI Pocket 3: This camera produces stable footage and will turn to keep you easily in shot, plus it’s budget-friendly at around $400.
- Canon EOS M200 (you can find used ones on eBay): This 4k-capable camera has a 3” touch screen that you can easily position to see what your camera is seeing, and costs around $550.
- Sony ZV-1F: Perfect for vloggers, this camera boasts an ultra-wide 20mm lens to get everything in frame, even at arm’s length. It has a large 1″ sensor and F2 lens for great low-light performance and background defocusing (bokeh). Features like Eye-AF, a side-articulating touchscreen, and a directional 3-capsule mic make it user-friendly.
Microphone
Your camera may well come with a built-in microphone, but for the best quality audio, you’ll want a dedicated mic that you can position correctly. These vlogging microphones should all do the job perfectly for you:
- Samson Q2U: This dynamic (rather than condenser) microphone is portable and travel-friendly, and costs around $60.
- Rode NT-USB: This small microphone that punches well above its weight, and costs around $100.
- Razer Seiren X: This mic cuts out background sound well, it’s a great option for live streaming videos, and it costs around $60.
You can find plenty more options in my roundup of the best cheap podcasting microphones.
Lighting
Good lighting makes a huge difference to your videos. The simplest option is a ring light, though you may want to create a fancier lighting setup as your video blog grows.
Some great options are:
- Godox SL60W: This powerful LED light is durable, strong, and has fully adjustable brightness, plus it’s easy to reposition. It costs around $140.
- GVM 2 Pack LED: For a slightly more involved setup, buying two LED lights lets you get your lighting just right. Both together cost around $170.
- UBeesize Selfie Ring Light: This cheap ring light is portable, has three lighting modes, and is a good option if you’re on a tight budget, at $28.
Recording and Editing Software
As well as the hardware required—a camera, recording microphone, and lighting—you’ll need recording software to film your videos.
No one records the perfect video on the first take, so you’ll also need software that lets you edit your videos.
All these options let you both record and edit video:
- iMovie: If you have a Mac OS computer or a device running iOS, then you could use iMovie to record and edit your videos. It’s free, user-friendly, and has common editing features like rearranging and deleting clips.
- Lightworks: A more advanced editor, lightworks has more tools and video effects, with the ability to export directly to YouTube. The basic version is free, though you can pay for Lightworks Pro (from $23.99/month) to get access to premium features like multi-cam support.
- Camtasia: This software lets you record your screen, so it’s ideal for software tutorials and PowerPoint presentations, and you can also add callouts, animations, time counters, voice overs, and much more when editing. It costs around $300.
How to Record and Produce Your First Video Blog
You’ve got your equipment—and now it’s time to create your first video (when the rubber really hits the road in learning how to start a vlog). Even if you love talking on camera, you might be feeling a little nervous, especially if you don’t quite know how to use all your new equipment yet.
Just take it step by step, and you’ll have your video up on YouTube before you know it—then you can dive into the digital marketing tactics that’ll help generate views. Here’s what you need to do:
Step 1. Write Notes or a Script in Advance
Few people are gifted enough speakers to record straight off the top of their head, without any preparation. That’s a recipe for lots of false starts, “ums,” and long pauses that you’ll later have to edit out. Trust me, I know first-hand.
Instead, create notes to speak from, structure a loose intro for your video blog post, or even write out bullet points (or a full script) for your entire video. Plenty of video bloggers (vloggers) do this, and it’s a great way to make sure you cover everything you want to include in your video.
If you work from a script, you can also get a rough idea upfront of how long your video will be. Most people speak at around 150 words per minute—so if your script is 1,500 words, your video will be about 10 minutes long once edited down.
You might want to create basic templates for your video scripts, so you can easily come up with new scripts. You’ll likely want an introduction at the start and a call to action at the end of each video, for instance.
Step 2. Test Out Your Recording Equipment and Software
If you haven’t yet tried out your camera, mic, lights, and recording software, now’s your chance.
Even if you have given them a go, it’s worth double-checking that your setup is working correctly: something as simple as repositioning your mic or changing the brightness of your lights could make a big difference to the quality of your video.
Before you start recording your full video, do a quick test video to check that everything looks and sounds great. You don’t want to launch into your first vlog only to find that your mic was on mute the whole time (it’s an easy beginners’ mistake).
Step 3. Show Your Personality
Don’t be afraid to show your personality on camera. Unless you’re creating a corporate vlog for a boring day job, be yourself! You can crack jokes, be goofy, or even swear: so long as it fits with the brand you want to establish, anything goes.
There are so many video blogs out there that yours is only going to rise to the top if you can give your target audience a sense of connection with you. And that starts by letting your personality shine through in your videos.
Remember, no one sees what you’ve recorded until you’re ready. So give yourself permission to experiment and let loose. If you decide that what you’ve recorded isn’t working, no problem: you can just re-record it.
Step 4. Edit Your Vlog to Remove Mistakes
You’ve just hit “Stop” on your recording software—and it’s tempting to think that your job here is done.
But before you upload your video, there’s still work to do. Even if you’re creating a casual, chatty vlog, you’ll likely want to edit your video to remove any mistakes—like that moment where you stumbled over your words and had to start a sentence again, or the bit where your neighbor’s lawn mower was all too audible before you closed your window.
Editing and video production can be a little tedious—and you may well find that it takes a lot longer to edit your videos than it takes to record them in the first place. But remember that, in Orson Welles’ words, “the whole eloquence of cinema is achieved in the editing room.”
Step 5. Add Captions and Other Elements
Adding captions (also sometimes called subtitles) to your video helps make it more accessible.
If someone watching your video is Deaf, they’ll need those captions in order to follow it. If your viewer doesn’t speak your native language fluently, the captions can be a great help in understanding what you’re saying – especially if you have a strong accent. And some people simply prefer to watch videos with the sound off. While YouTube generates captions with AI they can often be incorrect so always verify what is there at a minimum.
Your video editing software may be able to transcribe your voice and automatically add captions – but do check through these for accuracy, and edit them where required.
While you’re editing, you might also want to add extra elements to your videos – like text callouts, sound effects, animations, a screenshot, or simply a button that prompts viewers to subscribe. All these elements can help make your videos high-quality – and creative use of these extras could even become a hallmark of your vlogging style.
Step 6. Upload Your Finished Vlog to YouTube
Once you’ve edited your video—and watched it through one final time to make sure you’re happy with it – then it’s time to upload it to your YouTube channel.
Tip: YouTube supports a range of video formats, but they recommend using MP4.
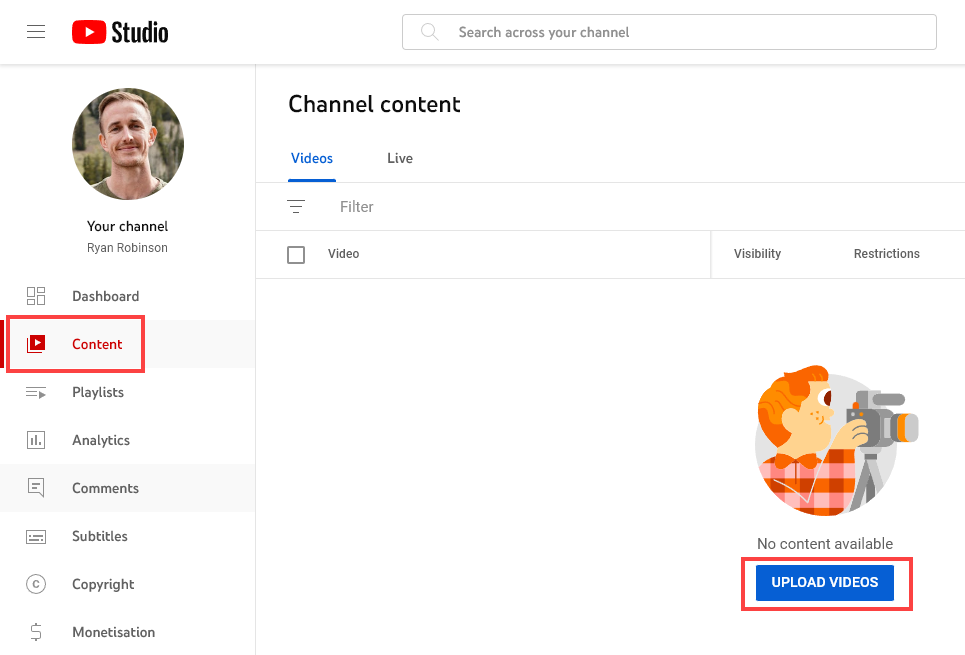
In the YouTube creator studio, head to Content then click the Upload Videos button:
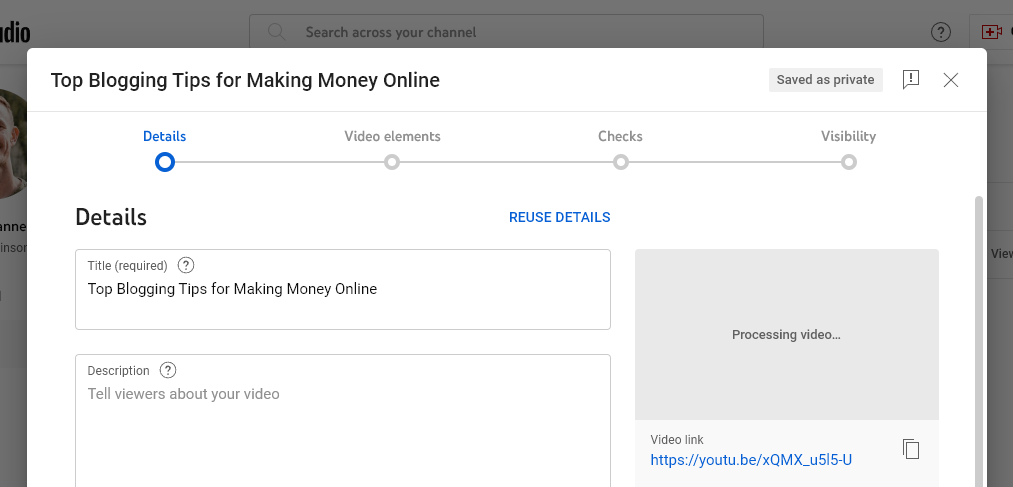
You’ll need to select your video file from your computer. While it’s uploading, you can set the title, description, choose the thumbnail, and more. Be sure to follow these YouTube thumbnail guidelines to make sure you’re uploading an image that’ll help your video get more views.
Once your video has finished uploading, and passed YouTube’s automatic checks, click the Next button to proceed. You can add an end screen, add cards to promote related content, and more.
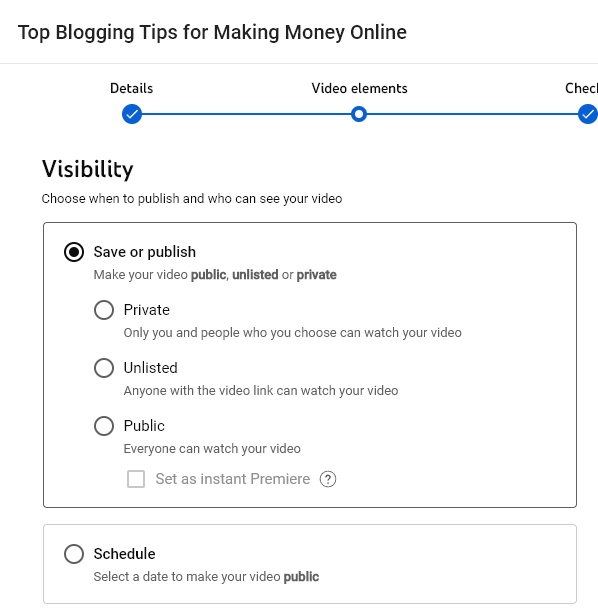
Finally, you’ll have the option to schedule or publish your video. You can also keep it private if you’re not ready to publish it yet:
Congratulations! You’re now a video blogger—you’ve successfully learned how to start a vlog once you’ve published your first YouTube video 🎉
Creating a Website (Traditional Blog) to Support Your Vlog Growth
Hoping to make money as a vlogger one day? I’d be willing to bet that’s one of the top reasons you found this guide on how to start a vlog in the first place.
While you could simply create your vlog as a YouTube channel only, you’ll likely find it’s easier to reach your video blogging goals when you have a website or traditional blog to support the growth and promotion of your vlog on YouTube.
Setting up a website and starting a blog is cheap and straightforward—we’ll run through everything you need to do to get started.
Ready to Start Your Blog Today?
Check out my ultimate guide How to Start a Blog (on the Side) that’s been featured on Forbes, Inc and Entrepreneur.
Getting a Domain Name and Web Hosting
All websites need a domain name (web address) and web hosting (24/7 internet-connected storage for your site).
A domain name will cost you around $15–$20 per year for a .com name. Web hosting is more expensive: typically around $5–$10 per month, though there are cheaper deals available, especially in your first year of running a blog or website.
To get the best value, I’d recommend choosing a web host that offers a free domain name: many do, and registering your domain name with your web host makes things simple.
My top cheap choices for this are Bluehost (best for tech support) and Dreamhost (best for absolute value). If you’re not sure which would suit you best, check out my Bluehost vs Dreamhost comparison.
Setting Up WordPress
Once you’ve signed up for web hosting, it’s time to install WordPress so you can create your blog or website.
Now, there are other options available for your website builder or blogging platform … but WordPress is by far the most popular (and for many good reasons). As a vlogger, WordPress is particularly useful because it lets you very easily embed a YouTube video just by pasting the URL into the WordPress editor.
Installing WordPress is quick and easy with both Bluehost and Dreamhost. You can find Bluehost’s instructions here and with Dreamhost, you can simply check a box when signing up to install WordPress automatically.
Once you’ve installed WordPress, you’ll likely want to change your blog’s theme (design). You can do this by logging into your WordPress admin area.
Most likely, you’ll have a link in an email to your WordPress admin area, but if not, just add /wp-admin to your website’s URL.
So if your URL is myvideoblog.com then your WordPress admin area will be myvideoblog.com/wp-admin.
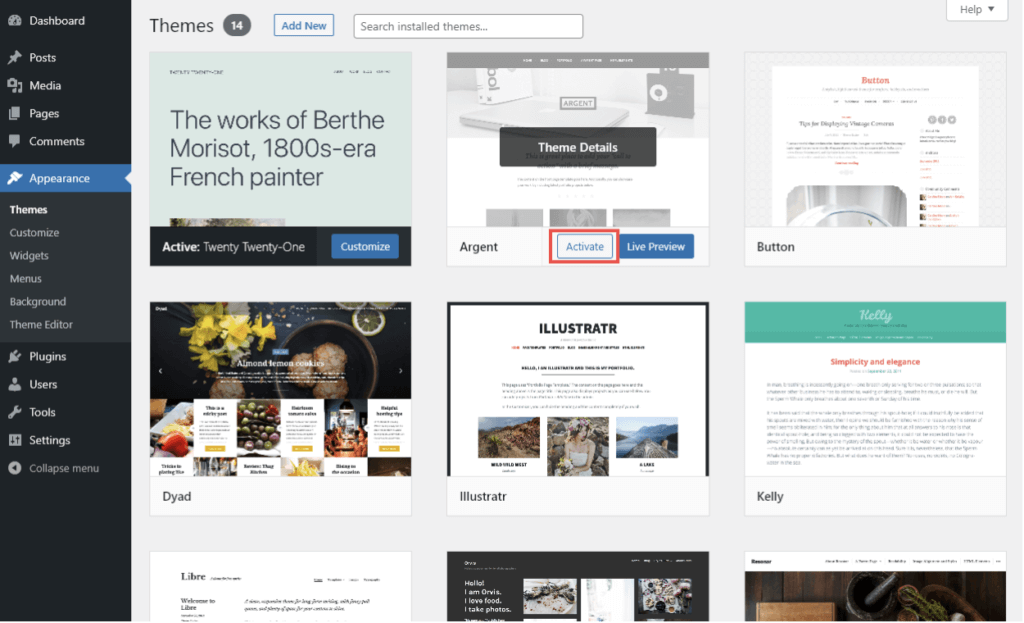
To change your theme, head to Appearance → Themes. You’ll see a list of themes, including your currently active one on the top left. Simply choose any theme you like, run your mouse cursor over it, and click ‘Activate’.
If you’re not sure which theme might suit you best and you’re feeling frazzled learning how to start a vlog already, check out my top WordPress theme picks to get started quicker today.
How to Create Blog Posts for Your Videos
Want to put your video on your blog, so people can watch it there without going to YouTube? This is really easy to do with WordPress.
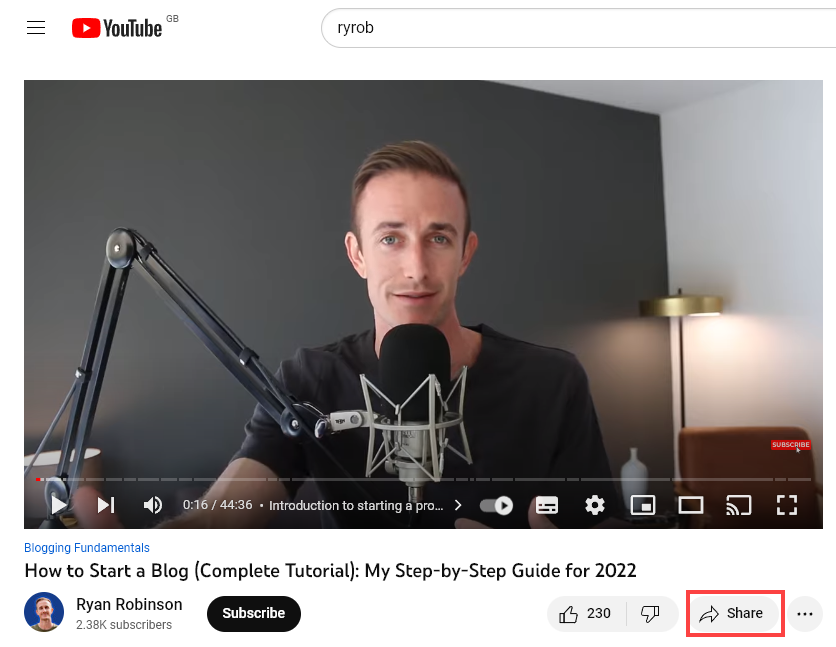
First, open up your video in a new tab and click the Share button beneath it:
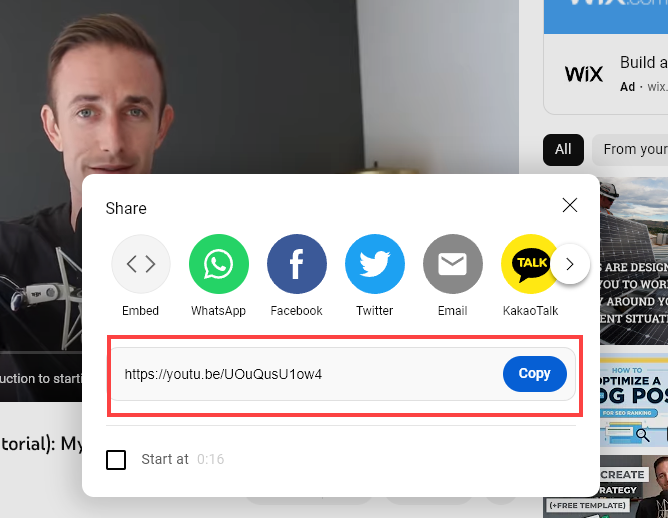
Then, you just need to copy the URL that you see there:
Your next step is to write a blog post in WordPress. My favorite way to get an instant first draft when creating a post from a YouTube video is to use a tool like my video-to-blog-post generator or VideoToBlog. These tools take your video’s transcript and quickly convert them to a blog post.
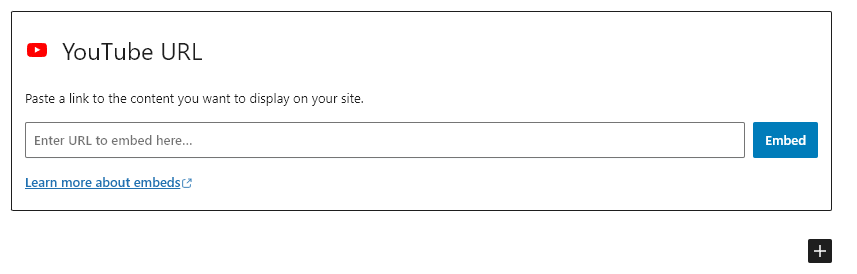
Go to Posts → Add New in your admin area, then you’ll see WordPress’s block editor for your post.
Go ahead and write whatever content you want for your post itself, then click the + button and add a YouTube block. This lets you paste in your video’s URL:
Tip: You can also create a Vimeo block in WordPress, if you want to host your videos on Vimeo.
Grow Your Video Blog’s Audience With Social Media and SEO
Looking to grow your video blog’s audience? Make sure you promote your blog posts on social media: this can be more effective than linking directly to your videos on YouTube, as your blog will be getting traffic.
Think about the social networks where your target audience might gather – perhaps Twitter if you have an audience of journalists and writers, or LinkedIn if you have a corporate audience.
You could start an email newsletter to encourage your new blog visitors to subscribe for updates – as well as nudging them to subscribe to your YouTube channel.
It’s also a good idea to invest some time in learning the basics of SEO (search engine optimization). Your YouTube videos are likely to rank well in search engines due to YouTube’s inherently strong SEO – it’s owned by Google, after all. But when it comes to your website or blog, you’re likely going to need to do some extra work to optimize your content.
4 Simple Ways for Video Bloggers to Make Money
Ready to start monetizing your video blog? There are lots of different ways to make money, so let’s run through some of the most popular.
1. Advertising Using AdSense
You can potentially make money running ads on your YouTube videos by joining the YouTube Partner Program. You’ll need to be signed up to Google’s AdSense.
To be eligible for the partner program, however, you need over 1,000 subscribers—not that easy when you’re starting out. And even if you’ve got that many subscribers, you might find that you don’t earn very much from in-video ads.
Another option is to use AdSense on your website or blog. You don’t need to have any set level of traffic or visitors to sign up and start running ads, though you will need to go through some steps to show that your site is eligible, and then wait to be approved.
2. Paid Product Placement
Just like bloggers can get paid to review products in their blog content, vloggers can get paid to feature products in their videos. You might get paid in cash – or you might get to keep the products. (And some products, like digital cameras, are worth quite a lot.)
To begin with, you may need to seek out companies to offer to partner up with them and promote their products. As your video blog grows, you might well find that companies come to you with requests. You could create a page on your website or blog with information about what type of product placements or sponsorship opportunities you offer.
Note that YouTube and FTC rules require you to disclose product placement or sponsorship in your video description.
3. Donations via Platforms Like Patreon
Some content creators take donations as a way to bring in some money. If you want to do more than buy an occasional coffee, then a great way to encourage memberships is through Patreon.
With Patreon, your viewers sign up to donate on a regular basis—and they get something extra as a result. That might be extra videos, or it could be something else additional, like live Q&A sessions with you, bonus resources to go with your videos, or anything else that your audience would be interested in paying for.
You might also want to mention new patrons in your video, or provide a list of Patreons on your blog or website.
Additionally, YouTube offers the ability to add memberships to your channel once you are monetized.
4. Affiliate Marketing
Affiliate marketing is one of my favorite ways to make money online. It’s quick and easy to get started with, and it can be an effective source of income even when you don’t have a very big audience.
As an affiliate, you promote someone else’s product or service – and if your viewer buys as a result, you get a cut of what they spend. Typically, your affiliate commission could be anywhere from 5% (e.g. for products on Amazon) to 50% (most common for digital products).
It’s easy to include the product or service links in your video description or in your blog post notes that go with your video – but again, to comply with FTC rules, you should disclose that these are affiliate links. (The same applies if you’re using affiliate links on social media.)
Ready to Get Your Video Blog Up and Running?
Starting a vlog is a bit more involved than starting a blog, because you’ll need good recording equipment and editing software to create quality content. You’ll need to budget for upfront costs on these.
However, vlogging could be well worth it for you. It’s a great fit if you prefer speaking to writing – and it lets you build an instant connection with your audience.
It’s simple to get your video blog started. Just follow the steps above, and you’ll soon have your vlog up and running.
Not quite sure whether a video blog is right for you? Take a look at my guide to blogging vs YouTube: that should help you make up your mind.
Thank you for this information Ryan.
You’re welcome! 🙂
How I can receive the money that I make on vlog?
It depends on how you’re monetizing, but if you grow your YouTube channel to the level where you’re generating revenue from ads on YT, then they’ll pay you directly through their YouTube Monetization platform 🙂
Thank you for your website Rob. I’m a fairly new subscriber to your blog and am quite impressed with your knowledge and experience. Getting excited to push that button on my dream to blog for a living.
You’re welcome, Cheryl! Push that button before you feel fully “ready” — you won’t regret it. Just starting and taking things one day at a time is the only way to build something that can one day be large/meaningful to you 🙂
Hi Ryan, been thinking of creating a martial arts series on Youtube in a particular martial arts style. I’ve been learning a lot of SEO for blogs for the travel blog my wife and I opened together last year, and I think I get the hang of it. But I feel like the toolset doesn’t exist for Youtube SEO. For example, Ahrefs has a very small fraction of the amount of data for Youtube searches as opposed to Google searches. Pagerank is nonexistent on Youtube so it feels like a whole different ball game. What is the right way to be going about Youtube SEO, and similarly, what about promotion?
Rereading this comment, just to edit a typo:
*backlinks are* nonexistent on Youtube, not Pagerank (though without backlinks I don’t know how pagerank could be used on youtube anyway).
if I want to set up a blog off the grid and the form of a search and rescue operation and I want to broadcast real Time events do I need special equipment tot the message out.
good information for new comer’s at this platform
How long does it typically take to see results from vlogging? Could you include some tips on building a loyal following?