Blog Conclusion Generator Free (AI-Powered) Conclusion Maker for Blog Posts
Need a little writing boost across the finish line? My free blog conclusion generator will summarize your post in the final paragraphs and come to a strong conclusion that helps readers remember your main points. This blog post conclusion generator does all the hard work for you, coming up with concluding paragraphs that leave a great final impression on your reader—keeping them engaged with your content.

Delivered Straight to Your Inbox
"*" indicates required fields
Bring Your Blog Posts to the Perfect End With This Free Conclusion Generator (and Grow Your Readers’ Loyalty)
Writing a blog post isn’t an easy task. You’ve got to come up with an idea, create the structure, draft the post itself, and give it a gripping introduction. Once you’ve finished explaining the final point from your plan, it’s so tempting to just stop.
That’s a huge mistake. If your post simply ends, or if you flounder around unsure how to finish, then you’re missing a massive opportunity.
Your post needs a proper conclusion. In it, you should sum up the main points from your post that you want readers to remember: what is it you’re hoping they’ll have learned or been encouraged by while reading?
Your conclusion is also a great place for a clear call to action. You might invite readers to engage with you by leaving a comment—or you could even promote one of your products or an affiliate product.
This needs to be right at the end of your post, where your reader is wondering what to do next. If you don’t prompt them, they’ll probably just click away to check their email or read the news headlines … and they may well never visit your blog again.
Conclusions can be tough to get right. That’s why I created my free blog conclusion maker, which will do all the hard work for you. (By the way, it doesn’t just work for blog posts: you can also use it to generate conclusions for other types of content, like white papers, free downloads, or even academic essays.)
What is a Blog Conclusion Generator Tool?
A blog conclusion generator tool is an AI-powered piece of software that takes the title and/or content of your post, then comes up with a suitable concluding paragraph. It should sum up your key points and give the reader some encouragement about putting what they’ve learned into practice.
The best blog conclusion tools will give you a range of options to choose from. They’ll let you choose important keywords to include (really helpful for your search engine optimization). Some tools, like mine, even let you choose the writing tone for your conclusion.
How to Craft the Perfect SEO-Friendly Ending with This Free Blog Post Conclusion Generator
Ready to give my blog post conclusion generator a try? It’s really easy to use and you can run it again and again, as often as you like. It’s completely free.
1. Type in Your Full Blog Post Title
First, you need to enter the full title of your blog post. It’s okay to use a working title if you haven’t yet finalized this—but the more accurate and complete your title is, the better your conclusion will be.

If you need a little help coming up with a good blog post title, check out my free blog title tool—that’ll steer ya in the right direction. Same goes with my free blog introduction tool, too.
2. Add Your Main Keyword and Secondary Keywords (RightBlogger Feature)
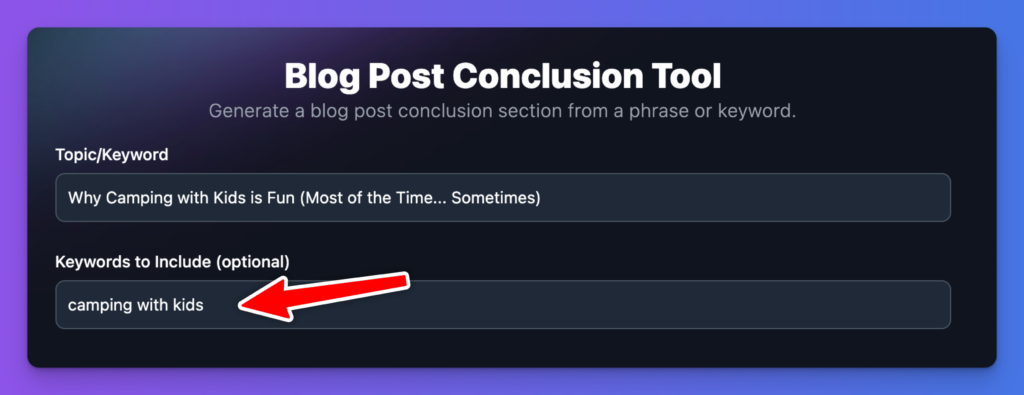
Next inside the fully featured version of this tool in RightBlogger, you can type in the main keyword for your blog post. While this is hopefully also included in your title, adding it here too makes sure that the conclusion generator will incorporate it into your blog post conclusion.

Tip: You can add multiple keywords by separating them with commas. The conclusion tool may not use all your keywords in every conclusion—but you can potentially put 2 or more different conclusions together.
What is a Keyword and Why Does it Matter?
A keyword is a search query that people use to find information—like your blog post. For instance, here on RyRob, the keyword start a blog brings a lot of traffic to my guide on How to Start a Blog.
Some keywords are very popular search queries. Others have just a tiny number of searches every month. You ideally want to optimize your blog posts for keywords that have around 1,000–10,000 monthly searches: they’re popular enough to make a big difference to your traffic, without being so popular that they’re impossible to rank for.
3. Choose Your Preferred Tone (RightBlogger Feature)
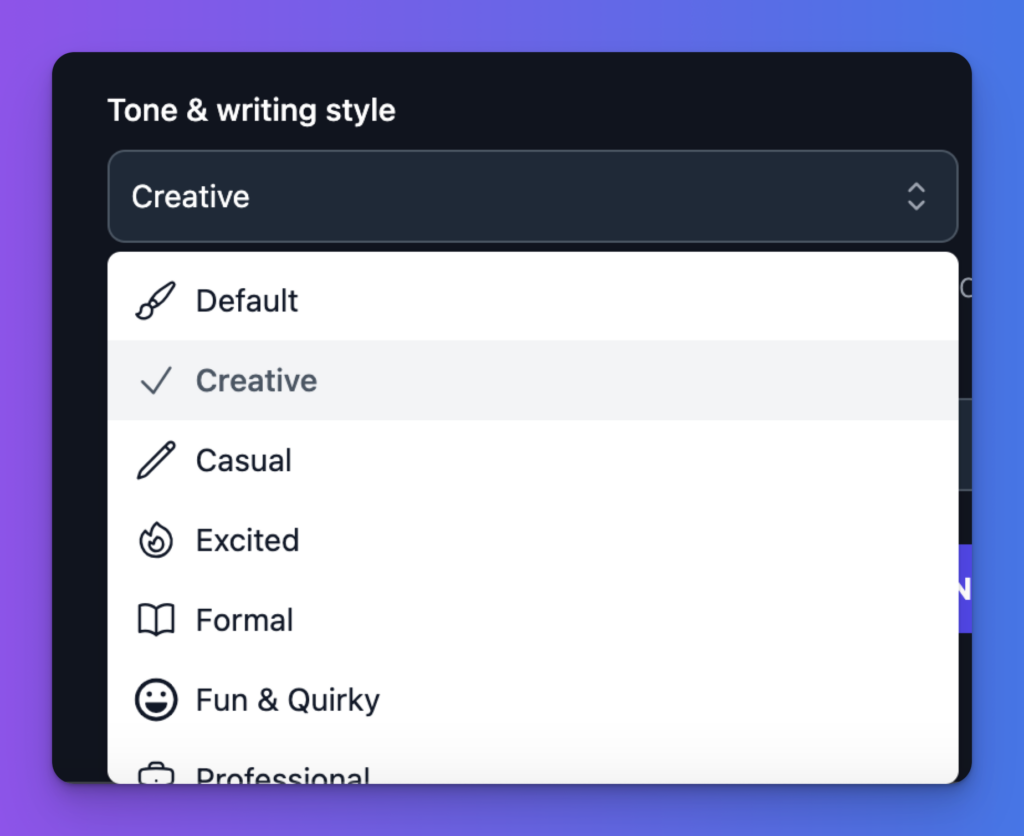
Some bloggers have a very casual, laid-back tone; others are a bit spiky and witty. Some are low-key and conversational; others have a more formal way of writing. Whatever your blogging voice, you want your conclusion to match with the rest of your post—and with the RightBlogger version of this tool, you can do that in a snap of your fingers.

My RightBlogger conclusion tool lets you pick from a wide range of different tones. Try out as many as you like. There’s no limit to how many conclusions you can generate. Once you’ve found a tone that’s a good match for your natural writing style, stick with that.
4. Generate 3 Good Conclusions to Choose From (Re-Run for More Options)
When you run the free conclusion tool, you’ll get 3 different conclusions to pick from, in your chosen tone. Just pick whichever conclusion feels like the best fit for your blog post and your readers. Remember, you want to leave a positive lasting impression on them.
If you’re not quite sold on any of the options, simply re-run the conclusion generator. You can do this as many times as you like. If you’re still struggling to come up with something you’re happy with, check that you’ve entered your title and keywords correctly, and try experimenting with a different tone.
Using This Tool as an Essay Conclusion Generator
Are you looking for an essay conclusion rather than a blog post conclusion? Good news—my free tool works as an essay conclusion generator too. If you want to use it that way, here are my tips for getting the most out of it:
1. Type in Your Full Essay Title (the Essay Question)
The more information you give the conclusion generator, the more accurate the results. Use your full essay title (that’s generally the essay question that you’re writing about).
2. Include Keywords from Your Essay
Even if you’re writing an essay or report rather than blog content, the keywords still matter. Use short keywords that relate to key points in your essay. For example, in an English essay, your keywords might be the names of authors you discussed, or literary terms. For a History essay, your keywords might be specific theories or time periods.
3. Important: Choose the “Formal” Tone
Although I designed this tool with bloggers and online content creators in mind, the “formal” tone works well for essays and academic papers. Make sure you pick that as your conclusion will be too casual otherwise.
The conclusion tool only generates a single paragraph, which probably won’t be long enough for your essay’s conclusion. I strongly recommend using it as a starting point to help you get past writer’s block and craft your own unique conclusion to your essay.
Bonus: Use My Blog Post Conclusion Checklist to Make Sure Your Post Ends Powerfully
Once you’ve finished writing your blog post, you’ll want to make sure your conclusion is doing its job well. Here’s my quick checklist to make sure you’ve finished your post with a bang.
- Make sure you’ve included your primary keyword plus any important secondary keywords
- Check you’ve summed up a key point or important takeaway from your post
- Add a link to at least one other post on your blog
- Give the reader a clear next action (e.g. leave a comment, check out a product)
- Think about your tone and how readers will feel after reading your conclusion (energized? encouraged?)
- Keep it short and focused, don’t lose momentum as you approach your concluding sentence
- Proofread your conclusion—readers may slow down at this point, making typos more obvious!
- Add important disclaimers if necessary (e.g. if you need to make it clear that you’re not giving financial/legal advice, or if you haven’t included an affiliate disclaimer earlier in your post)
Now, let’s dig into the features and how to use my free AI-powered blog conclusion paragraph maker.
How this Free Blog Post Conclusion Generator Works: Key Features
If you haven’t used an AI-powered text generator before, you might be wondering just how this whole shebang works. There’s some nuance to weaving AI tool usage into your writing process. Let’s take a deeper look at its different features.
Topic/Keyword (You Can Enter the Full Title)
The most important thing for you to enter into the conclusion generator is the topic/keyword, if you want truly impactful conclusions. While it’s OK to just type in your general topic here, I strongly recommend using your full title if you can. The conclusion writer tool’s artificial intelligence means it can understand human language, so the more information you give it here, the better your conclusion will fit your piece of writing.
What if you don’t have a title yet? It’s fine to enter a more general topic here. You can also enter additional information in parentheses (like your main argument or thesis statement), which can be really handy for product pages.
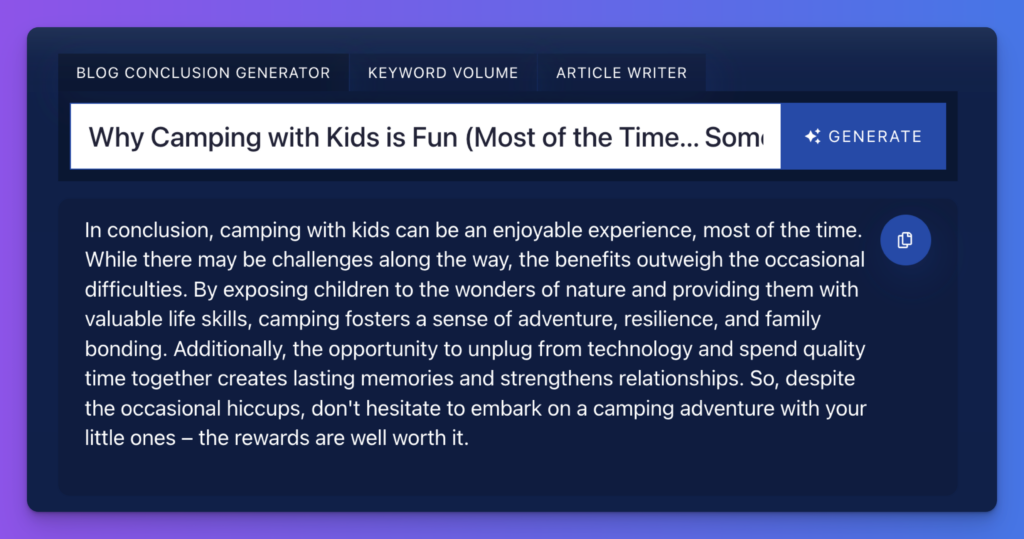
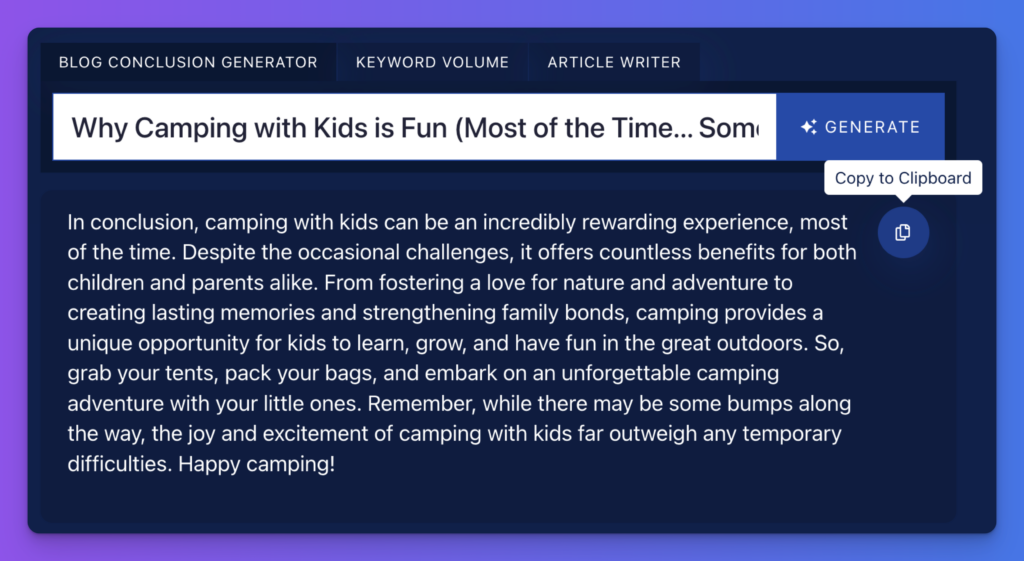
For instance, the topic/keyword “Why Camping with Kids is Fun (Most of the Time… Sometimes)” gives the conclusion tool enough information to come up with a persuasive conclusion:
“In conclusion, camping with kids can be an incredibly rewarding experience, most of the time. Despite the occasional challenges, it offers countless benefits for both children and parents alike. From fostering a love for nature and adventure to creating lasting memories and strengthening family bonds, camping provides a unique opportunity for kids to learn, grow, and have fun in the great outdoors. So, grab your tents, pack your bags, and embark on an unforgettable camping adventure with your little ones. Remember, while there may be some bumps along the way, the joy and excitement of camping with kids far outweigh any temporary difficulties. Happy camping!”

Keywords to Include (Separate with Commas)
While you don’t have to add keywords when you’re using the conclusion tool inside RightBlogger, it’s a really good idea to add those in. Your keywords are hugely important for good search engine optimization (SEO), and one vital place to put keywords is in the conclusion of your blog post (along with the title, subheadings, and introduction).
You can simply enter your primary keyword in this field, or you can add secondary keywords too. Make sure you separate them with commas.
Tone & Writing Style to Match Your Blogging Voice (RightBlogger Feature)
Good conclusions come from your heart, not just a generic AI output. Just like my other AI-powered blogging tools (i.e. my free AI article writer), the fully-featured conclusion generator inside RightBlogger lets you choose your tone & writing style. This conclusion writer is limited to just the default setting, however. In RightBlogger, there are lots of different tones to choose from, so experiment with any that sound like they’d be a good fit for you.
Tip: The default, creative, casual, fun & quirky, or empathetic tones are good ones for many bloggers.
Of course, it’s always a good idea to at least lightly edit your generated conclusion so that it fits seamlessly with your own writing voice. Don’t just rely on the AI algorithms, as however powerful an AI is, it can’t completely capture the essence of you on the page.
Language: Choose Your Preferred Language (RightBlogger Feature)
The fully featured blog post conclusion generator inside RightBlogger can produce flawless text in 100+ different languages, but this one is limited to English, Spanish and French outputs. It defaults to English (US), but if you’re blogging in a different language, see if yours is on the list. That could save you a lot of time in manually translating your chosen conclusion. You can even pick English (UK) if you want to use UK spellings in your blog post.
Blog Post Conclusion Writer FAQs (Frequently Asked Questions)
Is it plagiarism to use the blog conclusion paragraph generator tool?
No, using the blog conclusion generator tool isn’t plagiarism. The tool is powered by AI, which creates unique, plagiarism-free text tailored for your unique blog post title and keywords. It’s not copying the text from anywhere on the web.
If you have any concerns at all, you can simply run your conclusion through a plagiarism checker.
Important: If you’re using the conclusion generator for your essay writing (to create an essay conclusion), using the text verbatim is likely to be against your academic institution’s rules.
Will this conclusion generator tool come up with a good conclusion?
This online conclusion generator tool has some limitations. It can’t read your whole blog post, so it won’t be able to take into account every nuance of what you’ve written. However, if you enter your full title plus important keywords, the tool should be able to come up with a useful, accurate last paragraph for your post.
The tool gives you 3 different conclusions to pick from, so you can choose whichever you think is best. You can also use the bonus conclusion checklist (above) to edit and add to your conclusion.
This tool also acts as a concluding paragraph generator: it’s not designed to be a full summary generator, so it doesn’t give you multiple paragraphs of text. It gives you straight to the point, effective conclusions. If you want the final part of your post to be more than a paragraph, you could easily put together and edit several different conclusions, or you could add your own thoughts and ideas to create a longer conclusion.
Can I use this conclusion paragraph generator as an essay conclusion generator?
I designed my conclusion tool for bloggers and online content creators, but you’re very welcome to use it to help you get ideas for your essay conclusions or for wrapping up research papers too.
However, please keep in mind that you should never use AI-generated content straight up in an essay or research paper. It’s really important that your academic writing represents your own thinking, research, and writing. That’s especially critical if your essay or research paper counts toward your final grade.
My conclusion tool only generates a paragraph of high quality text for each conclusion, so this is likely to be a lot too short for your essay’s conclusion, too. Instead, you’ll want to use it as first draft inspiration. You can then edit it to add your own thoughts, examples, and use cases (and if it’s a more personal essay, your feelings, heart, and soul!) into the text.
What other AI tools should I use to improve my SEO?
One great thing about the blog conclusion tool is that it helps you get keywords into your conclusion (without writing conclusions yourself)—an important part of your on-page SEO. I’ve got a bunch of other useful AI tools, too, that can help you improve your blog’s search engine presence. They’re all really user-friendly and best of all, every single one of my tools is completely free.
You’ll want to take a look at my other AI writing tools—like my blog introduction generator, AI keyword research tool, the AI blog idea generator, the AI article writer, the AI paragraph rewriter, blog title generator, domain name generator, and the meta description generator. (More coming soon!) All of these are based on their full, unlimited versions in RightBlogger, which has over 70 AI-powered blogging, social media, and SEO tools.
I’ve also got a round-up of top AI tools here for you, plus a guide to AI blogging tools specifically.
Why did you make this conclusion writer a free tool?
Like every blogger, I started out with no traffic and no money from my blog. I couldn’t afford all the fancy tools out there, even though I knew they’d help me to grow my blog faster.
I spent a lot of time hunting around for the best free tools (and I was so grateful for the generosity of everyone who provided those). I also split the cost of some online tools with my friends.
Now that I’ve seen so much success with my blog and business, I want to give something back. I wanted to create the tools that I wish I’d had in those early days … and I promised myself that I’d make these tools completely free, forever, with no strings attached. This tool is free because I care. I want you to succeed!
You don’t have to enter your email address or jump through any hoops, and there are no limits. You can use the blog post conclusion generator (plus all my other tools) to craft more compelling conclusions completely free, as often as you like.
When you start making money blogging (and I’m confident you will!) then I’d love it if you’d try my suite of AI tools, RightBlogger. It’s a full version of all my free tools, with lots of extras as well. The pricing is designed to be affordable and reasonable for smaller blogs, too.
Can I use the blog post conclusion tool before I’ve written my post?
Knock yourself out! As long as you’ve got your blog post title, or at least a clear idea of your topic, you can use the blog post conclusion tool at any stage of writing your post.
Most bloggers use it after writing their post, but you might want to instead try using it at the outlining stage. It can be helpful to have your introduction and conclusion written, so you just need to “fill in the blanks” by writing the main body to fit your blog post plan. (Of course, you can also use my free article writer to give you a hand with the whole thing, as that can produce long-form content in one go.)
Can I use the blog post conclusion writer for updating old posts?
Yes, you can use the blog post conclusion tool to update older posts on your blog. New bloggers often don’t realize that their posts need conclusions—so if that was the case for you too, don’t worry! You can easily go back and add stronger conclusions to your posts.
I’d recommend looking for posts that are getting good traffic (likely because they’re ranking well in Google). Then, make sure each one has a solid conclusion that includes a clear call to action. If you have a whole list of posts to update, my free conclusion generator can save you a lot of time.
Who is the blog post conclusion generator designed for?
When we created the blog post conclusion generator, we designed it with lots of different people in mind. Perhaps you’re a blogger, a content creator, a professional writer, an SEO professional, or a small business owner: this tool is for you! Or maybe you see yourself in a different role. If you write any kind of online content, then this conclusion generator should help you do it even faster and better.
While we didn’t specifically design this tool with more formal types of writing in mind (like essays or reports), you can also use the conclusion generator to help you out with anything that needs a conclusion. Use the options you get as a first draft to help inspire your own thinking.
Tool built by my insanely talented friend, @sup and powered by RightBlogger.