
If you’re wondering how to start an online store, AI can now help you build one that takes real orders in a single sitting… no coding required. But here’s the catch. You can’t just hand the whole thing over to Claude and say “go build it.”
The platform you choose and the tools you build with matter even more today than they did a few years ago. Get that part right and the rest gets a lot easier.
For this build, I’m making a real store for a small-batch candle maker, covering the website, the products, the cart, the checkout, and real payments. By the end, it takes an actual order.
Here’s the full video walkthrough where I build the entire store from scratch and run a live order all the way through.
Key Takeaways for Starting an Online Store
- A full store that accepts real payments can go live in one sitting, with no coding required.
- The platform you build on matters more with AI in the picture, because the wrong foundation can break the moment orders start coming in, or never reach fully operational status at all.
- WordPress.com’s Commerce plan includes WooCommerce, the engine that powers the entire build.
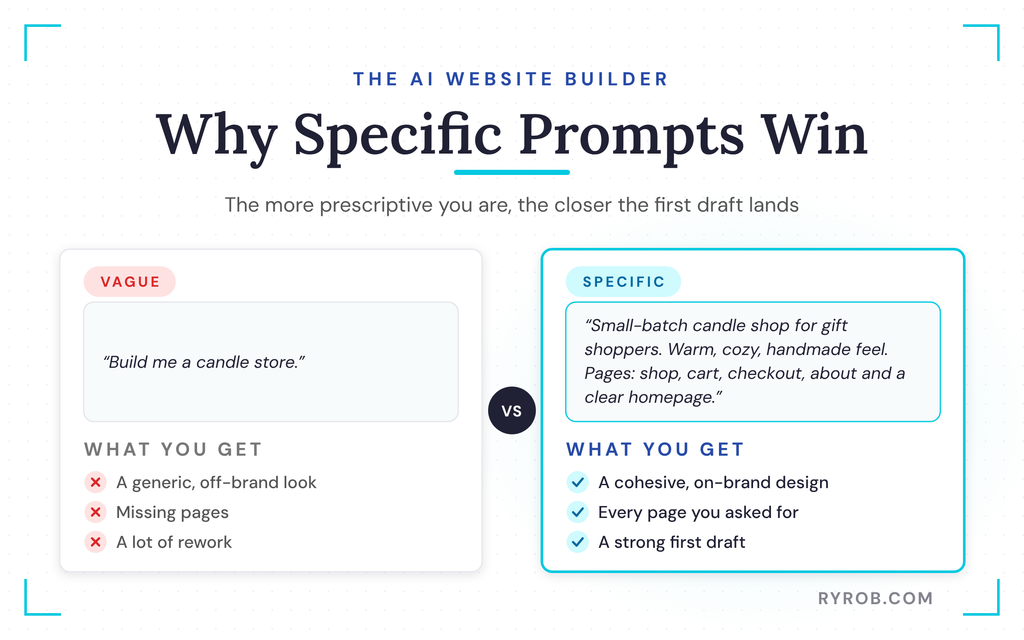
- Specific prompts beat vague ones. The more prescriptive you are with the AI website builder, the closer the first draft lands to what you want.
- The store works right away, but the last stretch of real product photos, shipping rates, copy, and tax settings is what you’ll polish over time.
Start Selling Your Own Products With WordPress.com
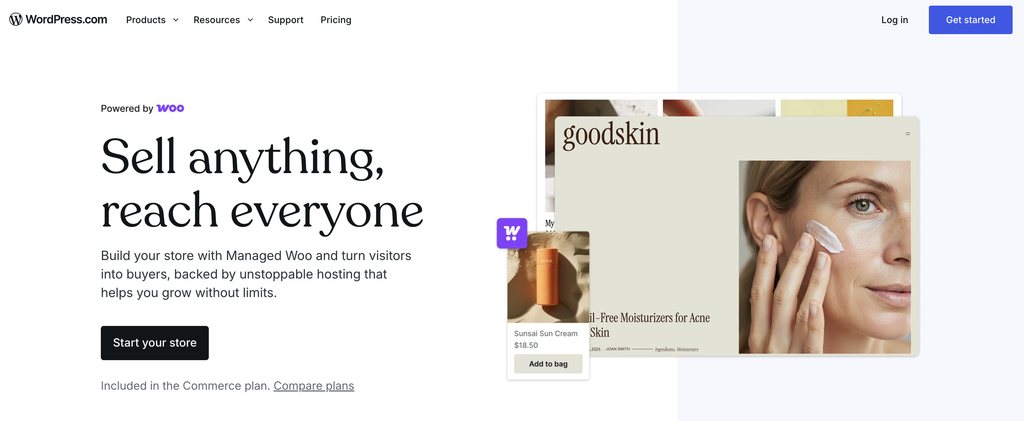
WordPress.com’s Commerce plan is what I used to build this entire store in one sitting. It comes with WooCommerce built in, so you get real products, a real cart, and real payments without touching code. You can start your own store on the same plan and have it taking orders sooner than you’d expect!
What You Need to Start an Online Store
Here’s who we’re building for. The store is for a maker, a small-batch candle maker who sells the candles she makes in her spare bedroom. Her niche is small-batch home fragrance, and her target audience is gift shoppers.
Her buyer persona is someone looking for a locally made housewarming candle. Right now, there’s nothing but candles stacked on a bed. By the end, there’s a real store with a foundation to sell them from.
A full ecommerce website needs every piece of the puzzle, and I’m building all of it here.
- Products
- A storefront
- A cart
- Checkout
- Real payments
If you want a closer look before committing, my full WordPress AI website builder review breaks down what it does well and what to fix first.
If you’re not sure what to sell yet, browsing a few small business ideas can help you lock in a product and a simple plan before you build.
One quick note on the platform. I’m building this online shop on WordPress.com’s Commerce plan, an e-commerce platform I’ve used for years, and it’s one of my favorites for running my own sites and stores.
WordPress powers more than 40% of the internet, and I only recommend tools I actually use. Readers may also come across Shopify in platform comparisons, but for this build I’m sticking with WordPress.com.
Building Your Storefront on WordPress.com
This part comes together in two quick moves. First I pick the plan that powers the store, then I let the AI design the site around the brand.
Choosing the WordPress.com Commerce Plan
Starting right on WordPress.com, I click the “Start your store” option. From there, I grab the domain name for the site.
If you’re not sure what domain you want yet, the tool will suggest some, or you can get started and sort the domain out later. My candle domain is ready, and it’s Ohm Candles.
When it comes time to pick a plan, I choose the Commerce plan. This sets me up with WooCommerce, the engine behind everything, plus WordPress.com’s AI website builder to make the buildout easy.
Designing the Site With the AI Website Builder
Because I chose the AI builder, I’m dropped straight into that process. WordPress.com has plenty of pre-made designs if you’d rather start that way, but I want to do this the fun way. So I choose “create a custom design” and chat with the WordPress agent to build it.
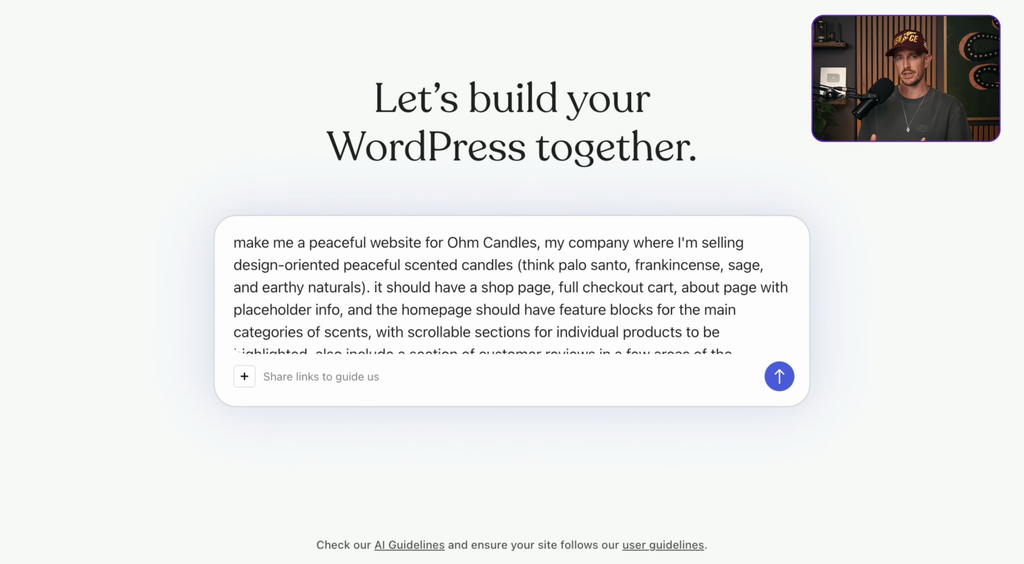
I start with a prompt that describes my candle business, branding, and the feel I want visitors to have. I include product and pricing details from my business plan so the ecommerce platform fits my target audience and candle niche.
I also list the pages I need. That includes a shop, a full checkout and cart, an about page with placeholder info, and a homepage with clear navigation. I can request social media links or an email marketing signup too.
Clear, prescriptive instructions help the AI build what I have in mind. When you leave room for ambiguity, don’t be surprised if the result looks different from what you pictured. Specificity, that’s the thing.
If I had design references for sites I like, I could share those too. Instead, I hit start, and the AI asks me questions about my business and the look and feel I’m going for. I say “show me your best.”
Then it creates a full site brief covering everything it’s about to build, so I can add goals or make changes before anything gets designed.
Here’s something I really like about how this AI builds. It follows a logical design process and doesn’t start building pages until it’s settled on a cohesive design style. If you’ve tried building sites with other tools, you know how much that matters.
I also get a live visual preview alongside the AI as it works, which is one of the more unique interfaces I’ve seen for this kind of thing.
I actually teamed up with WordPress.com on this build, and their Commerce plan is what makes the whole one-sitting approach possible. If you want to follow along on the exact same setup, you can start your own store on the Commerce plan.
Adding Products, Pricing, and Inventory
In about two minutes, I’m looking at a finished site with all the elements I asked for. There are placeholders where real product photos will go, but the AI has built an entire site from one paragraph.
I like the layout and the color palette, and the AI assistant offers several ways to move forward. Now I head to the dashboard, where a checklist guides me through the remaining steps. First up are the products.
In the WooCommerce area, I choose to add a physical product. WooCommerce also supports other product types, which is handy if you’re selling digital products like an ebook. A short tutorial walks you through each step if you need it.
This candle example keeps stock on hand, unlike a store that uses a dropshipping extension to have suppliers fulfill orders. For my candle, I add a few key details.
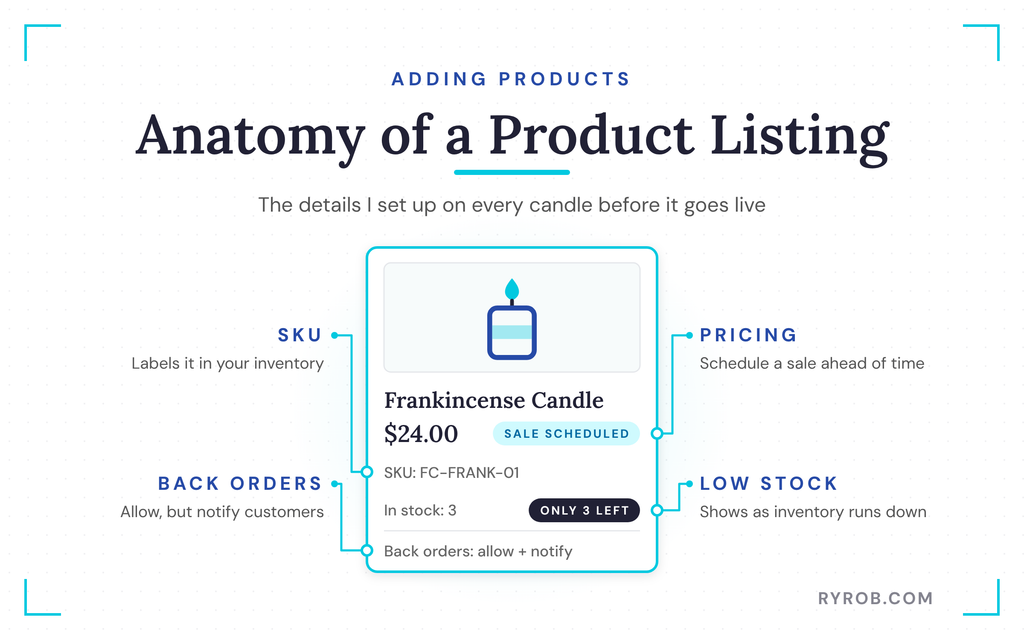
- The name and placeholder descriptions, which I can refine later
- Pricing under the product data section, including the option to schedule a sale ahead of time, which is great if you’re selling something before Black Friday
- A SKU so the candle is labeled in my inventory
- The stock count under stock management, plus back-order settings
For back orders, I choose “allow, but notify customers” so nobody’s expecting a candle next week. I also set a low stock threshold, which shows on the product as inventory runs down. That often helps with sales, so I use it.
Under the shipping tab, I add the product’s shipping details. The linked products feature is useful because I can connect a product to others people tend to buy together. Upsells and cross-sales become important later on.
For product images, I upload placeholder photos from my desktop. WordPress.com has AI image-generation tools, but for something like this, I’d highly recommend taking your own photos.
If I had a gallery ready, I’d upload shots with different angles, lighting, and settings. Finally, I categorize the candle as wood-scented, since clear categories make product pages easier to browse as your store grows.
With that, I publish my first product. Then I add three more, for a total of four candles.
People often assume this part takes forever, but it doesn’t anymore. Snap a few well-lit photos at home, or use placeholders while you get the store set up.
Setting Up Payments and Testing Checkout
Next comes the part that turns this into a business, the cart and checkout. A store isn’t just a catalog of items. It needs to look trustworthy, work smoothly, and get customers through checkout quickly.
Back in WooCommerce, I set up payments. WooCommerce has a built-in payment gateway that accepts payments from major providers, or you can use PayPal. I recommend Payments with Woo, because it keeps checkout simple.
Once your account is fully verified, customers have a few ways to pay.
- Credit card
- Apple Pay
- Google Pay
- Affirm
Activation requires some basic business information, and WooPayments walks you through connecting an existing Stripe account.
There are useful settings to check here, including dispute readiness and resolution. A clear refund policy and terms and conditions on your site and at checkout are important best practices. Clear refund information also helps your customer service answer questions and resolve concerns.
Requirements vary by location, so check your local legal requirements for each of these.
- A privacy policy
- Cookie use
- Applicable sales tax
- Any customer right to cancel
There’s also an add-on for accepting payments in different currencies, but I’m keeping it local for now.
Now let’s walk through the path a customer takes, from browsing to adding an item to the cart and checking out. That’s the flow we’re building.
From the homepage, the shop page sits behind the primary call to action. There’s a section about our inspiration, a display of the primary scents we’re launching with, a placeholder for customer reviews, and a bit about discovering the collection. It’s intentionally simple.
I open the frankincense candle’s product page, and I like what I see. SEO breadcrumbs are built right into product pages, and they help AI crawlers discover your products, so they’re an important feature.
I add the candle to the cart. The cart is clean and minimal, though you could add reviews, testimonials, more images, and upsells or cross-sells later.
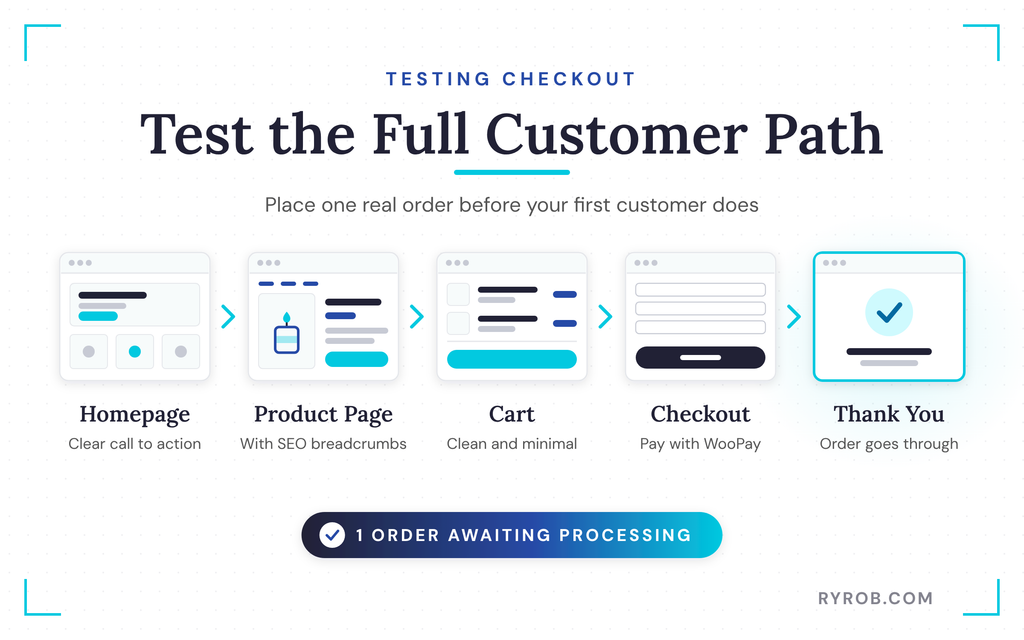
For now, I’m testing the transaction. I check out with Woo Pay, enter my payment and billing information for shipping, and place the order. It goes through, and I land on the thank-you page.
Managing Orders and Polishing Your Store
Back in the dashboard, there’s one order awaiting processing, the one we just placed. Clicking the info button opens an overview and shows its fulfilment status, from processing through completion.
For ongoing order fulfilment, I return to the product area and update the status. Once the candle ships, I select completed and hit update to notify the customer. I can also resend order details or new order notifications.
In the shipment tracking area, I add the tracking number so the customer can see where the order is. If your store uses dropshipping, confirm the supplier dispatch and tracking details fit your workflow. For help with fulfilment, WooCommerce Shipping is a fully built product.
The dashboard also shows customer history, including repeat purchasers and their total order amounts, which helps with customer service questions. It also includes a fraud and risk assessment.
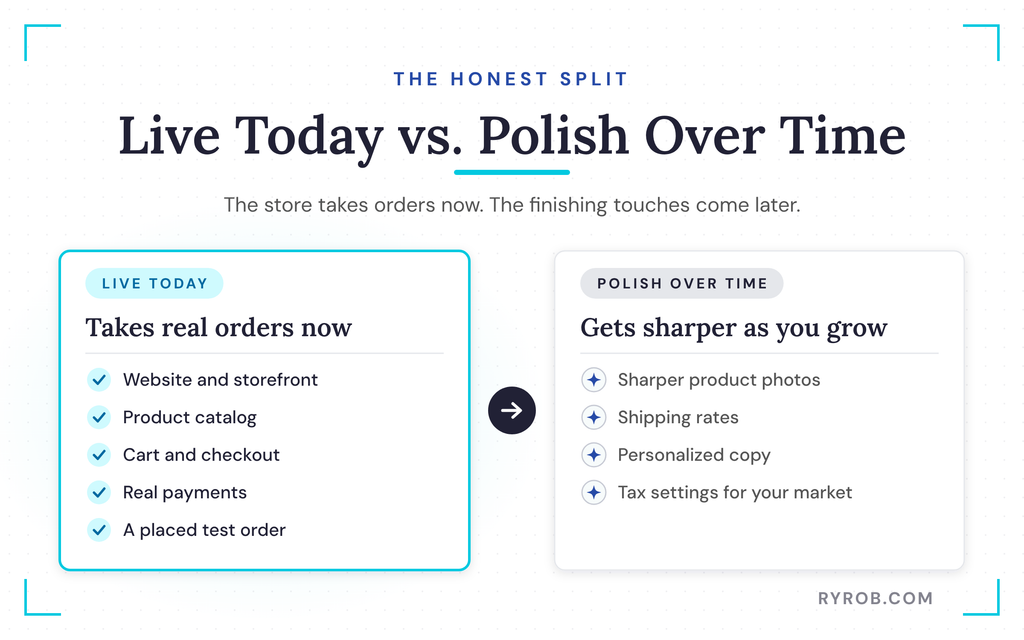
There it is, an entire storefront with a real order placed from start to finish on a store that didn’t exist this morning. The store can take orders today, and that part is real.
You can keep tuning the site with sharper product photos, personalized copy, and tax settings for your market. That’s the honest split between what works today and what you polish over time.
A couple of honest limits to know about. WordPress.com’s Commerce plan is best for owner-operators selling their own products, which describes most of the entrepreneurs I know.
If your business grows into a massive catalog with complex wholesale accounts or custom logic for hundreds of daily orders, you might eventually want a more specialized setup. That’s a good problem to have, and it’s how a store grows.
WordPress.com is built to grow with you, powering stores for more than 4 million brands, including Copa Wines and Polestar Electric Vehicles.
FAQs About Starting an Online Store
A few quick questions I hear a lot about starting an online store this way.
How long does it take to build a store this way?
The full build in this walkthrough, the website, catalog, cart, checkout, and real payments, comes together in less than 30 minutes, including a placed test order.
Do I need to write code or be technical?
You don’t. You describe your business and the pages you want in plain language, and the AI website builder handles the design and structure from there.
Do I have to make my own products, or can I dropship?
Either one works. This build keeps stock on hand for a maker selling her own candles, but WooCommerce also supports a dropshipping setup where your suppliers fulfill and ship orders for you. If you go that route, just confirm the supplier dispatch and tracking details fit your workflow before you launch.
What happens if my prompt is vague?
You’ll get a result that doesn’t quite look the way you want. Leaving room for ambiguity is the fastest way to end up with a first draft that misses, so clear, prescriptive instructions are what get you a strong starting point.
What still needs my attention after the AI builds the store?
The AI-generated site is a foundation. You’ll want to swap in sharper product photos, set your shipping rates, personalize the copy, and review tax settings for the places where you sell.
Final Thoughts on Starting Your Online Store
In less than 30 minutes, you can build a complete online store with a website, catalog, cart, checkout, and real payments. The flow works, and the order that came through proved it.
Where this setup wins most, in my opinion, is helping makers launch an online shop and sell their own products quickly. It’s easy to get live right now, and it gives you the foundation you’ll need to grow.
If you’ve been putting off starting a business because the store felt too technical, consider this your sign that it isn’t anymore. The same platform even lets you get paid through your writing with subscriptions and tips.
There are plenty of other ways to make money online, but selling a product you actually make is one of the most rewarding.
Start Selling Your Own Products With WordPress.com
WordPress.com’s Commerce plan is what I used to build this entire store in one sitting. It comes with WooCommerce built in, so you get real products, a real cart, and real payments without touching code. You can start your own store on the same plan and have it taking orders sooner than you’d expect!
